![]() Disclaimer:
Disclaimer:
This guide is not official documentation from Retool or Okta. It is a general reference based on what has worked with the current version of Okta's developer tools, and has been found helpful for many users. If you encounter issues or have specific questions related to Okta, we recommend contacting Okta Support for official assistance.
![]() General: The images below are meant to help supplement and visualize the setup process of what's already written in our Retool docs for setting up Okta SAML SSO: Configure Okta SAML SSO | Retool Docs
General: The images below are meant to help supplement and visualize the setup process of what's already written in our Retool docs for setting up Okta SAML SSO: Configure Okta SAML SSO | Retool Docs
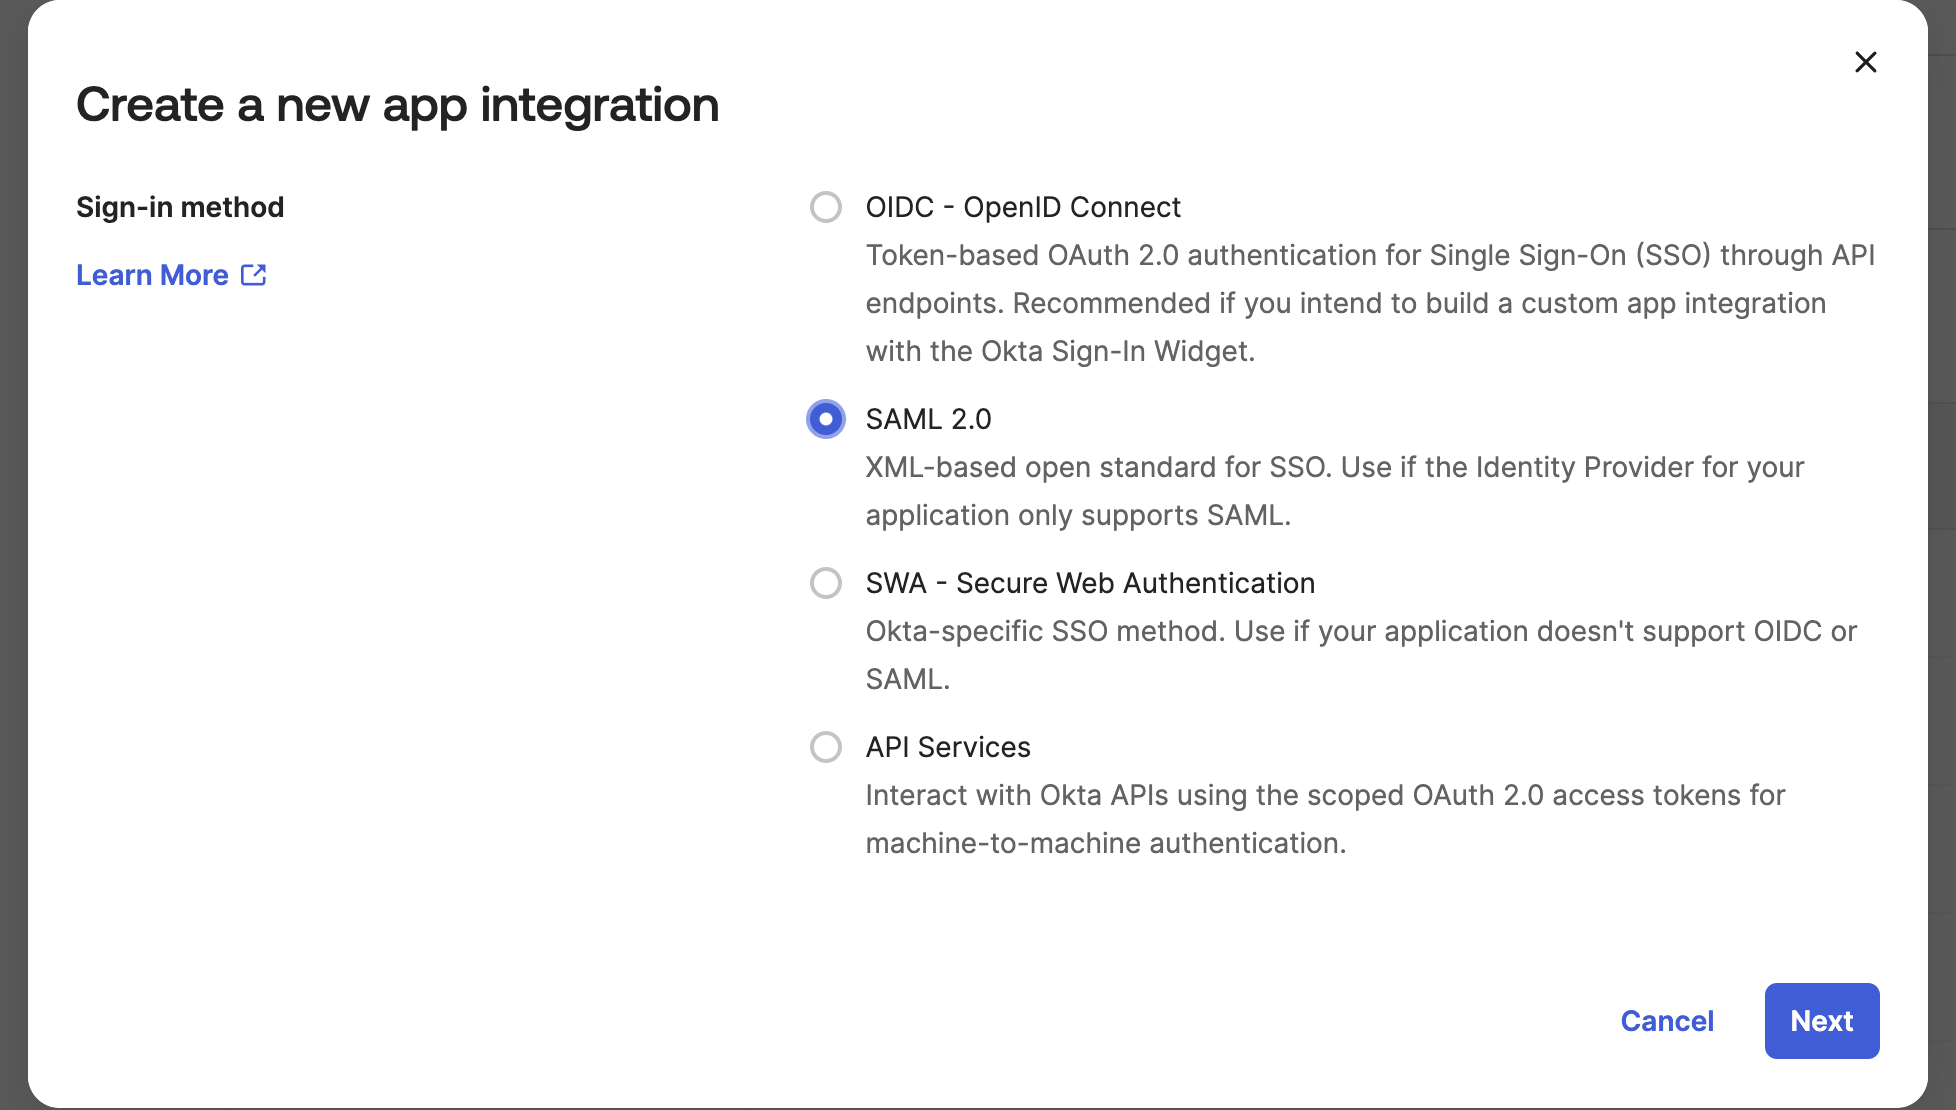
1. Create a SAML 2.0 app in Okta
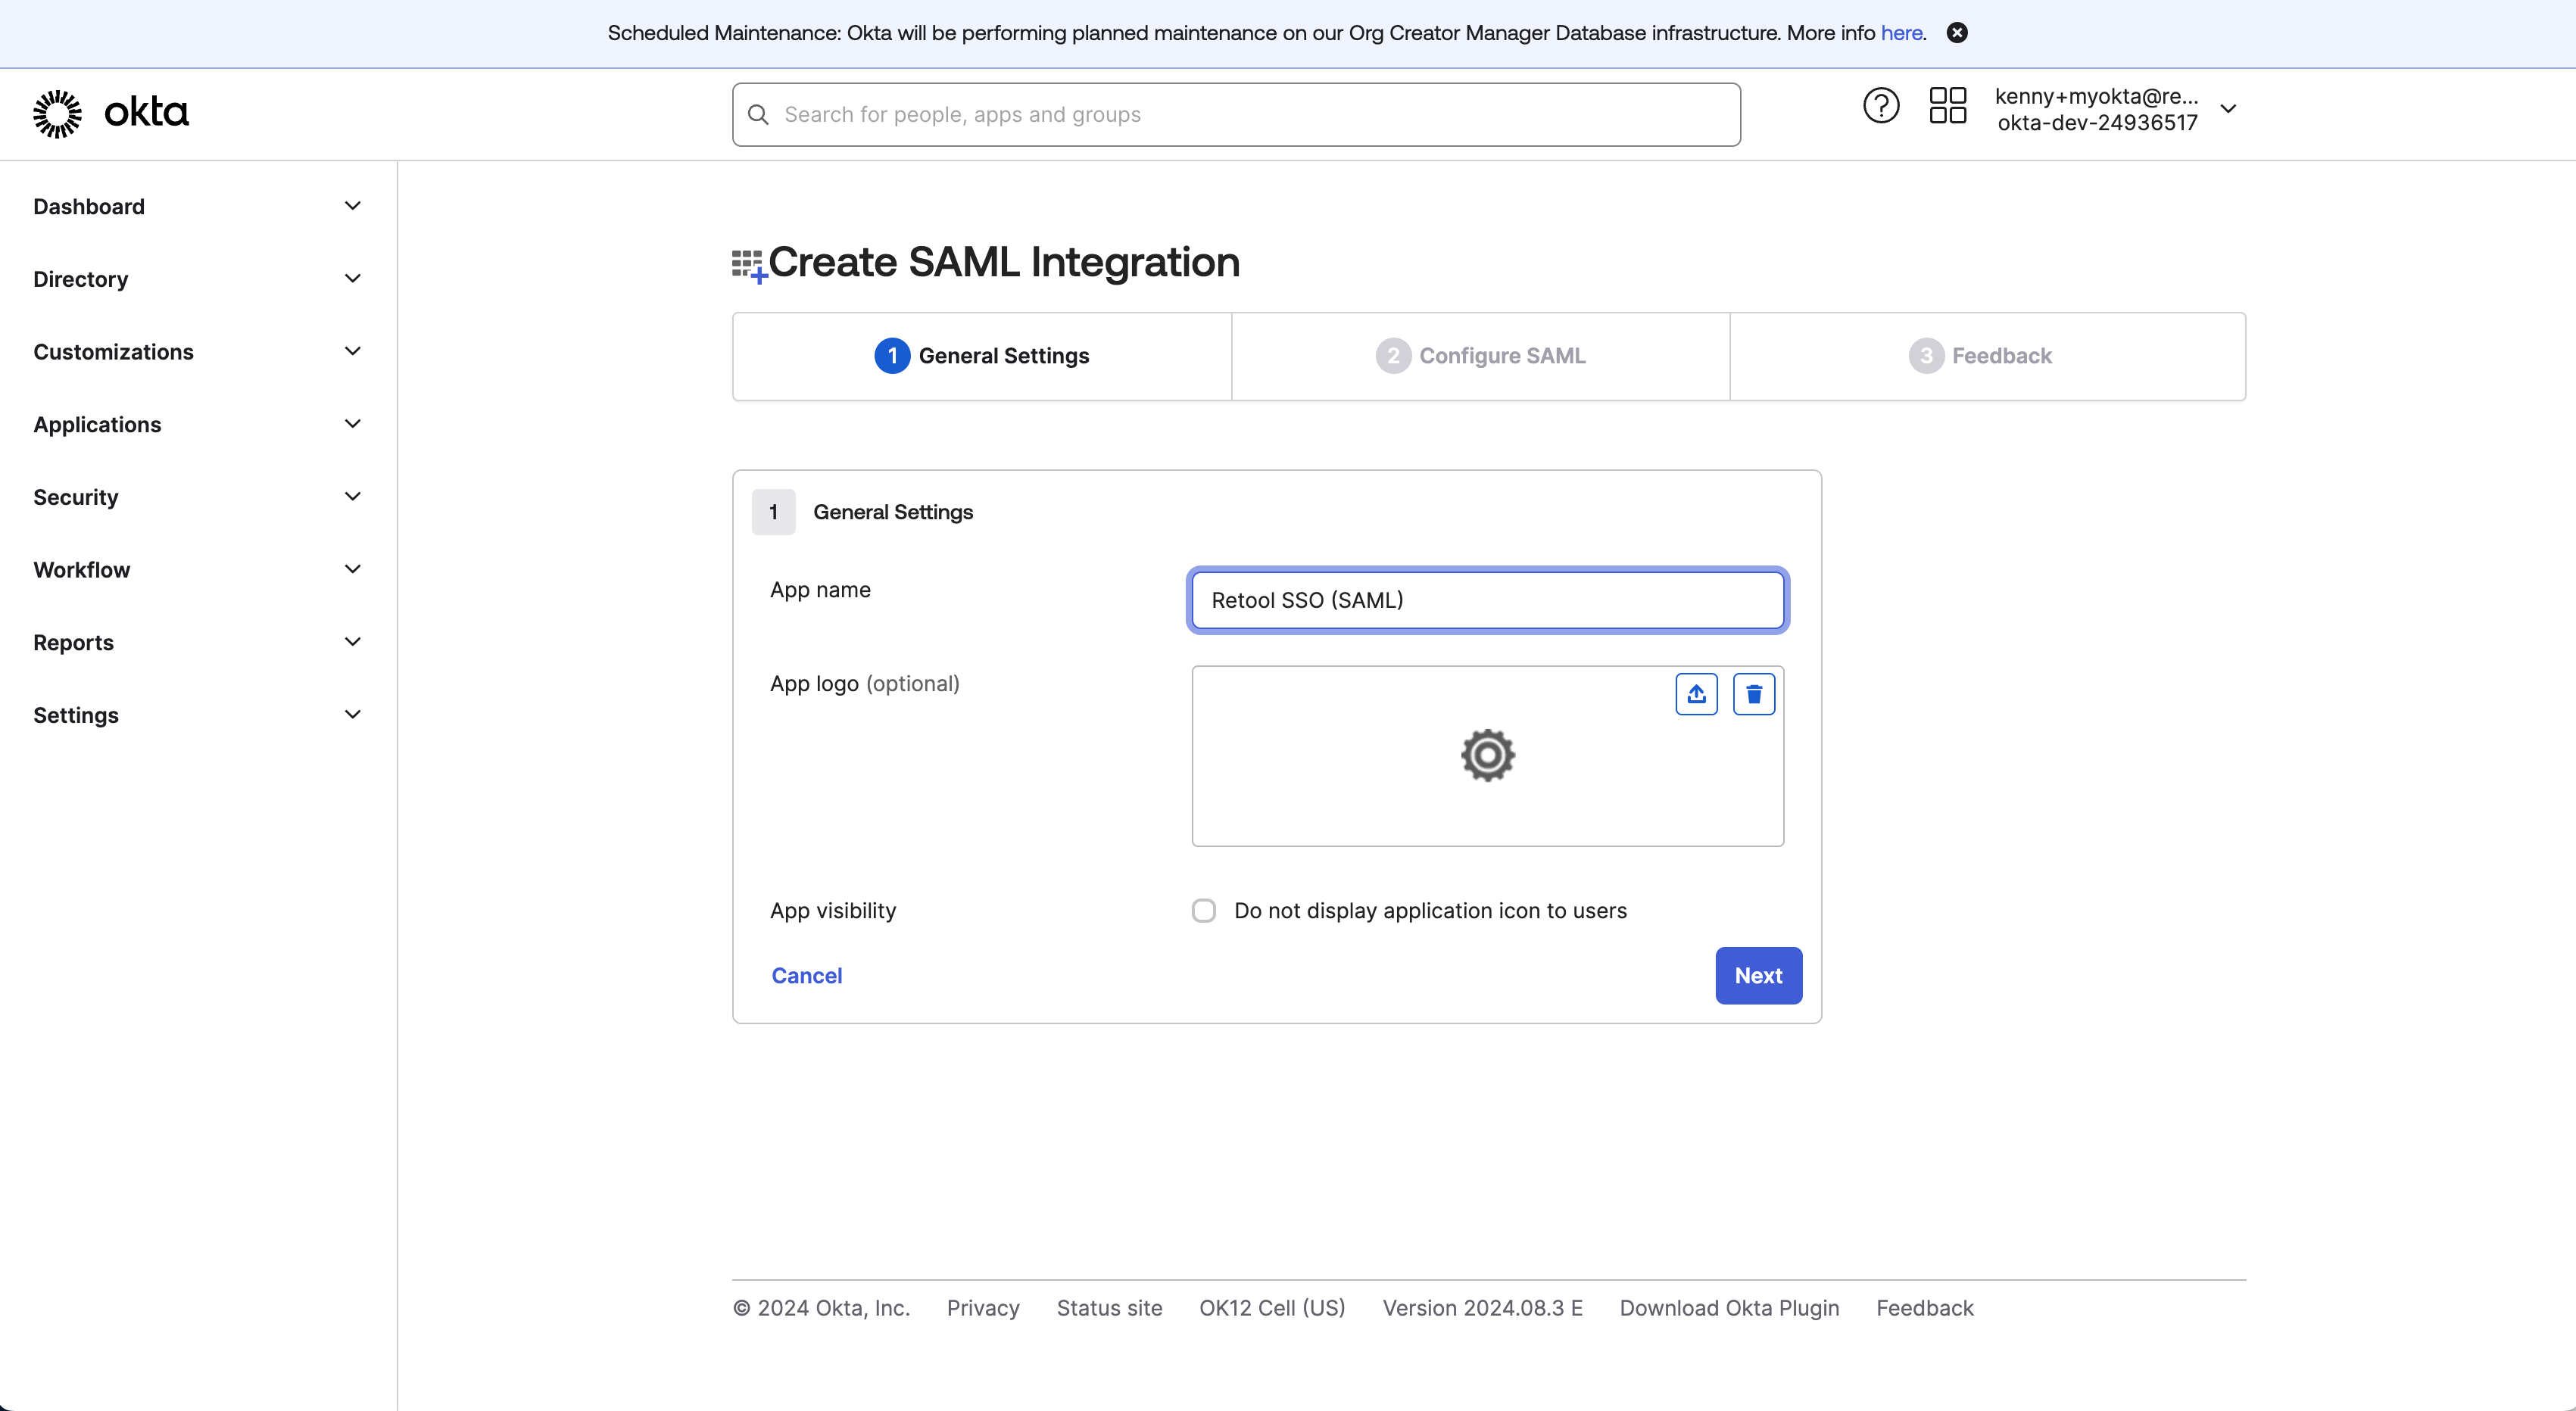
2. Name your SAML app
3. Enter details for your:
- Single sign-on URL
- Audience URI
- Attribute Statements
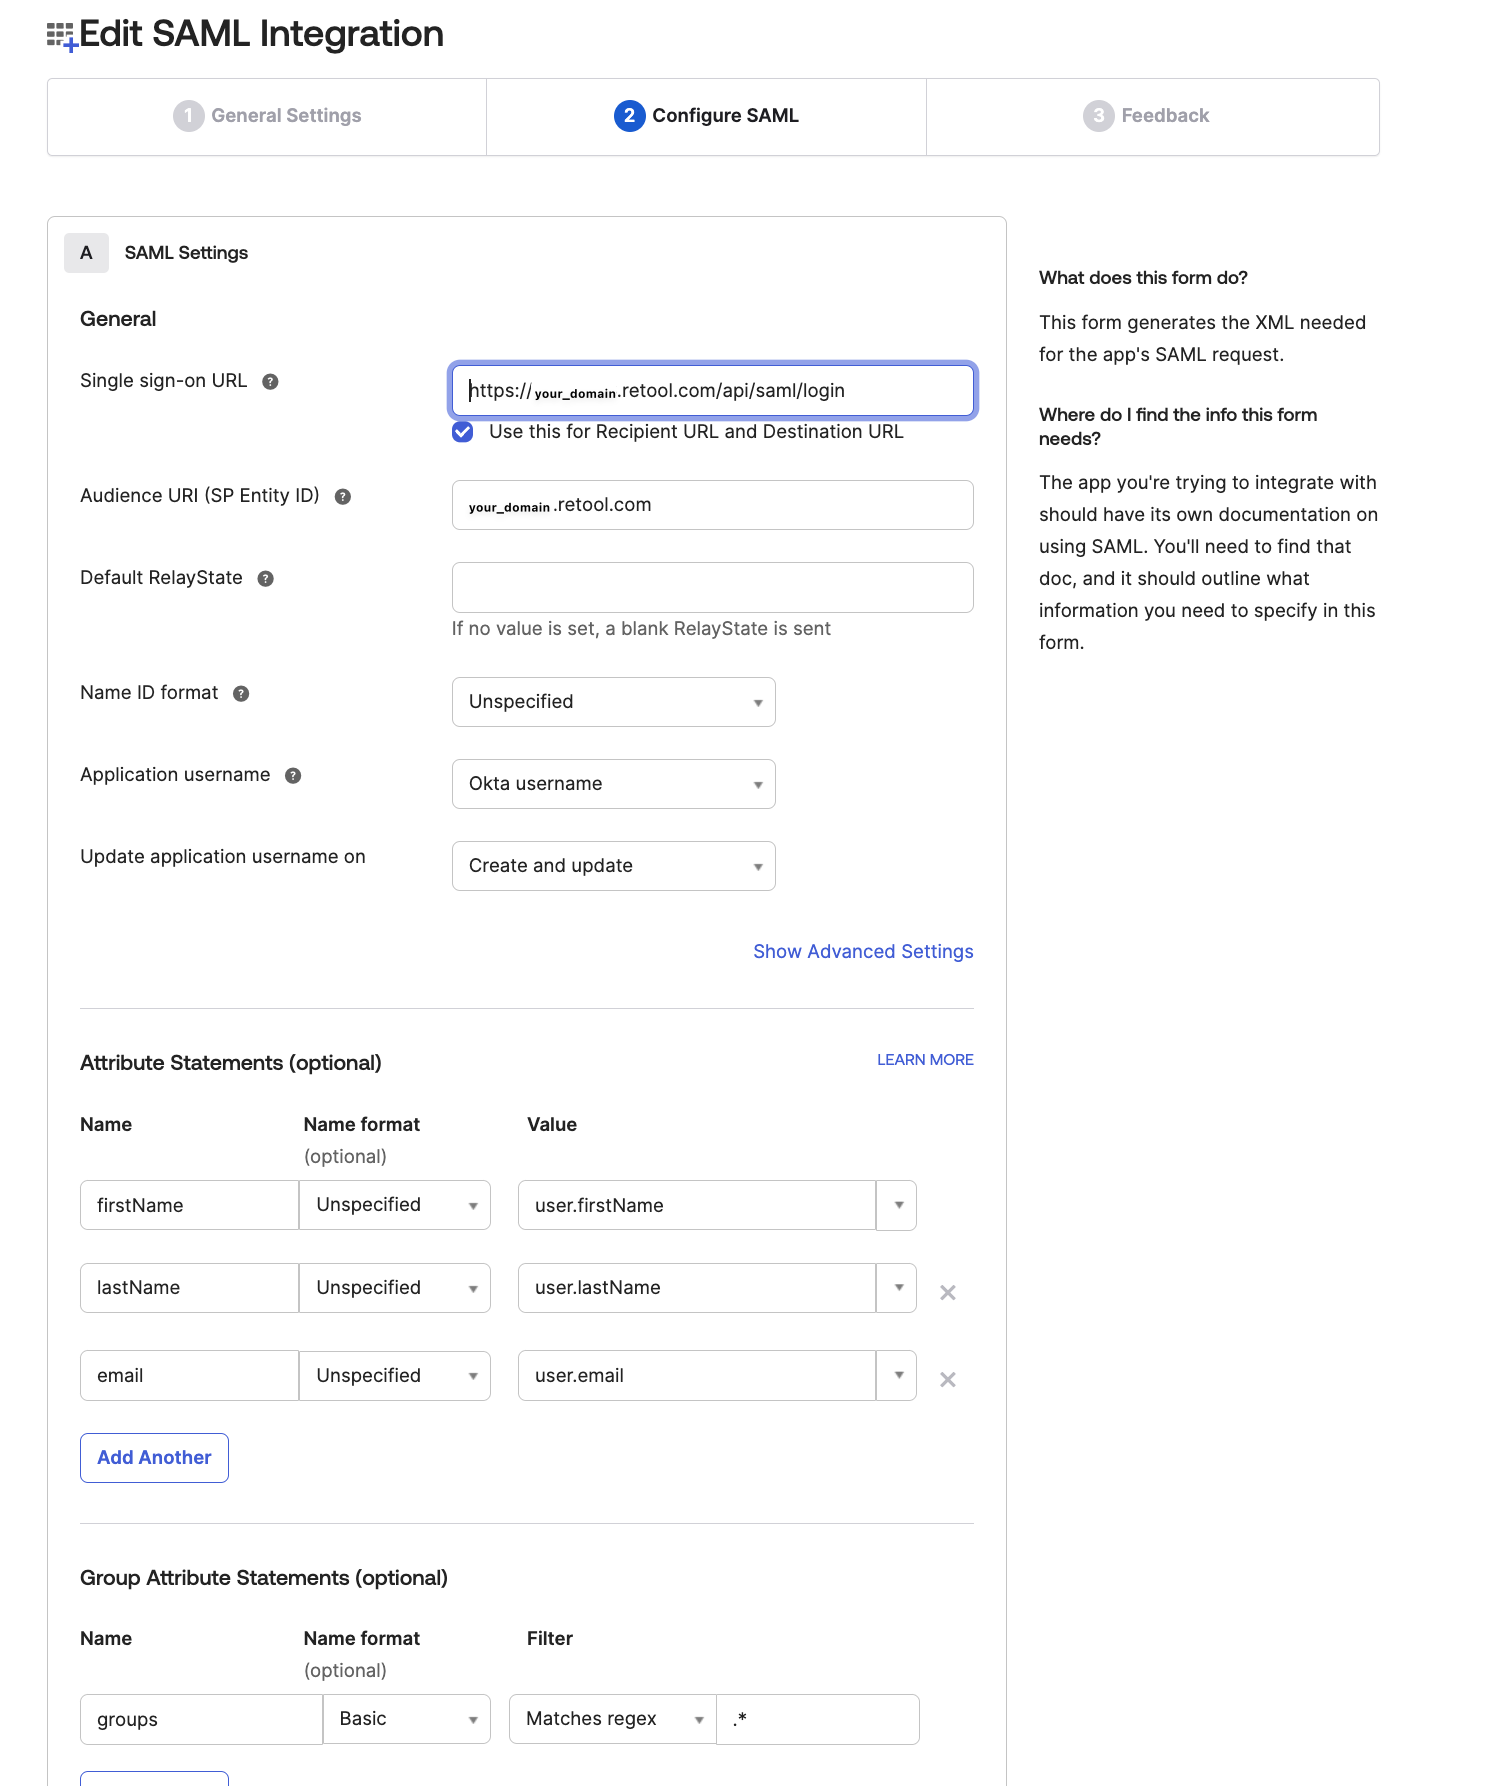
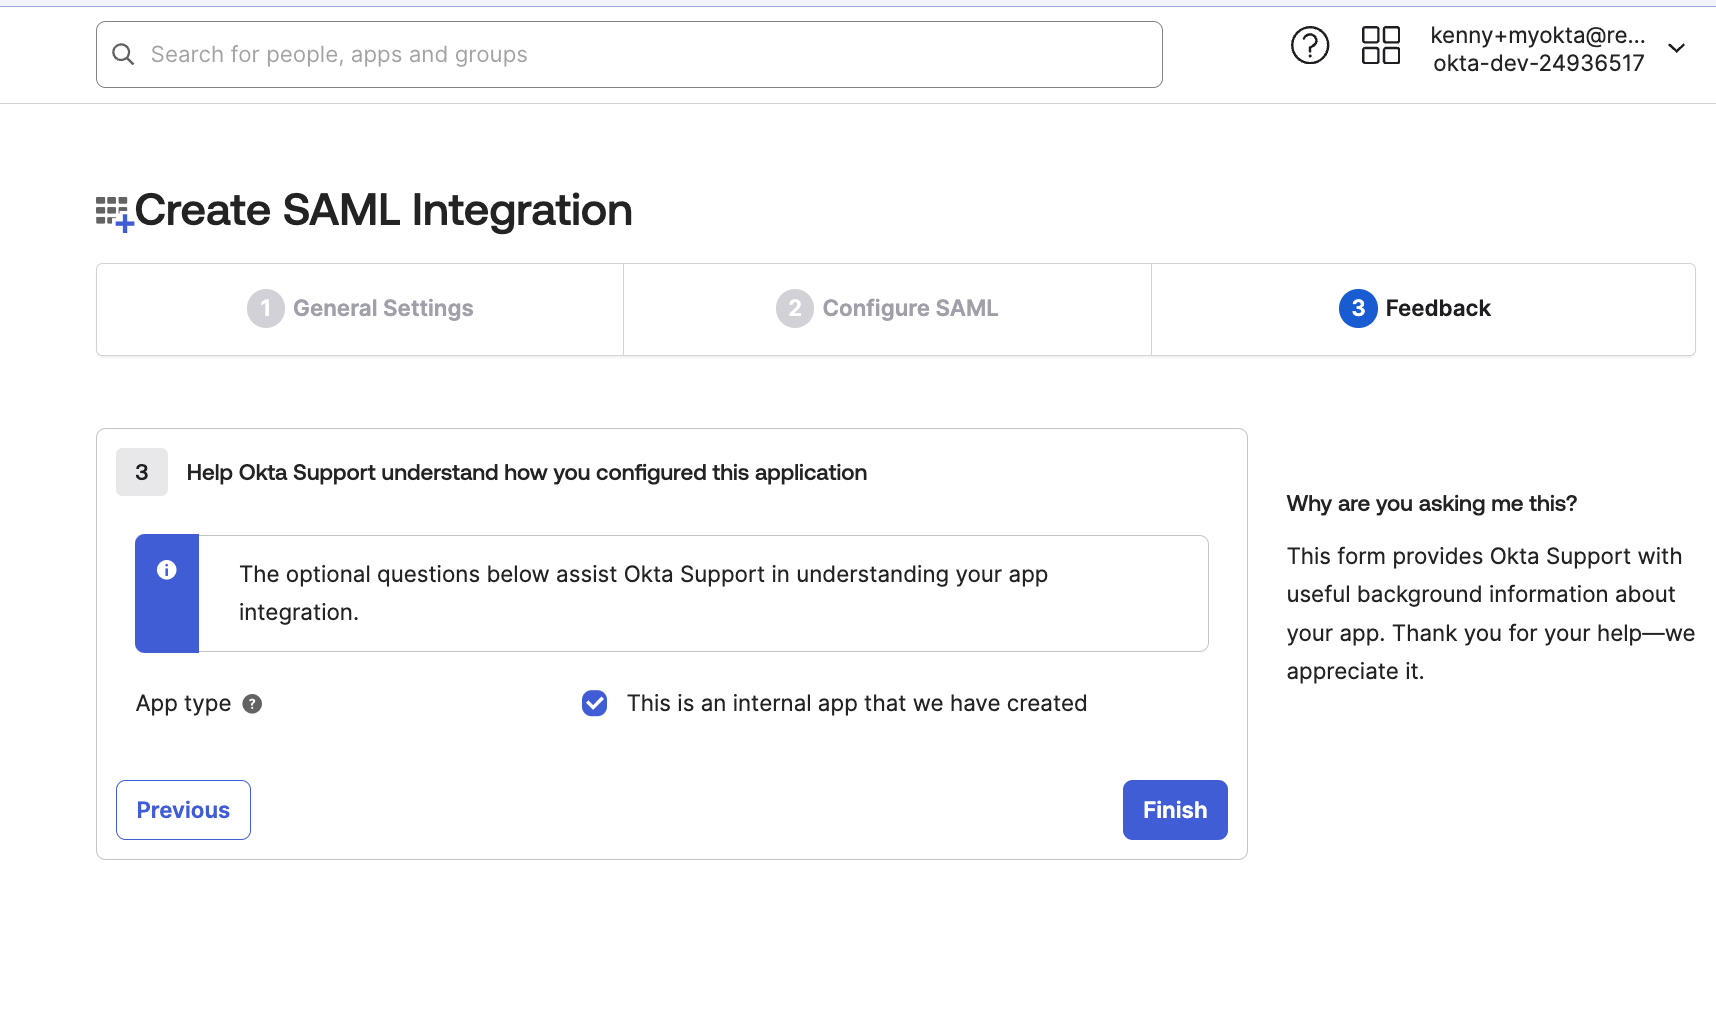
4. Click 'Finish'
Connecting Okta to Retool:
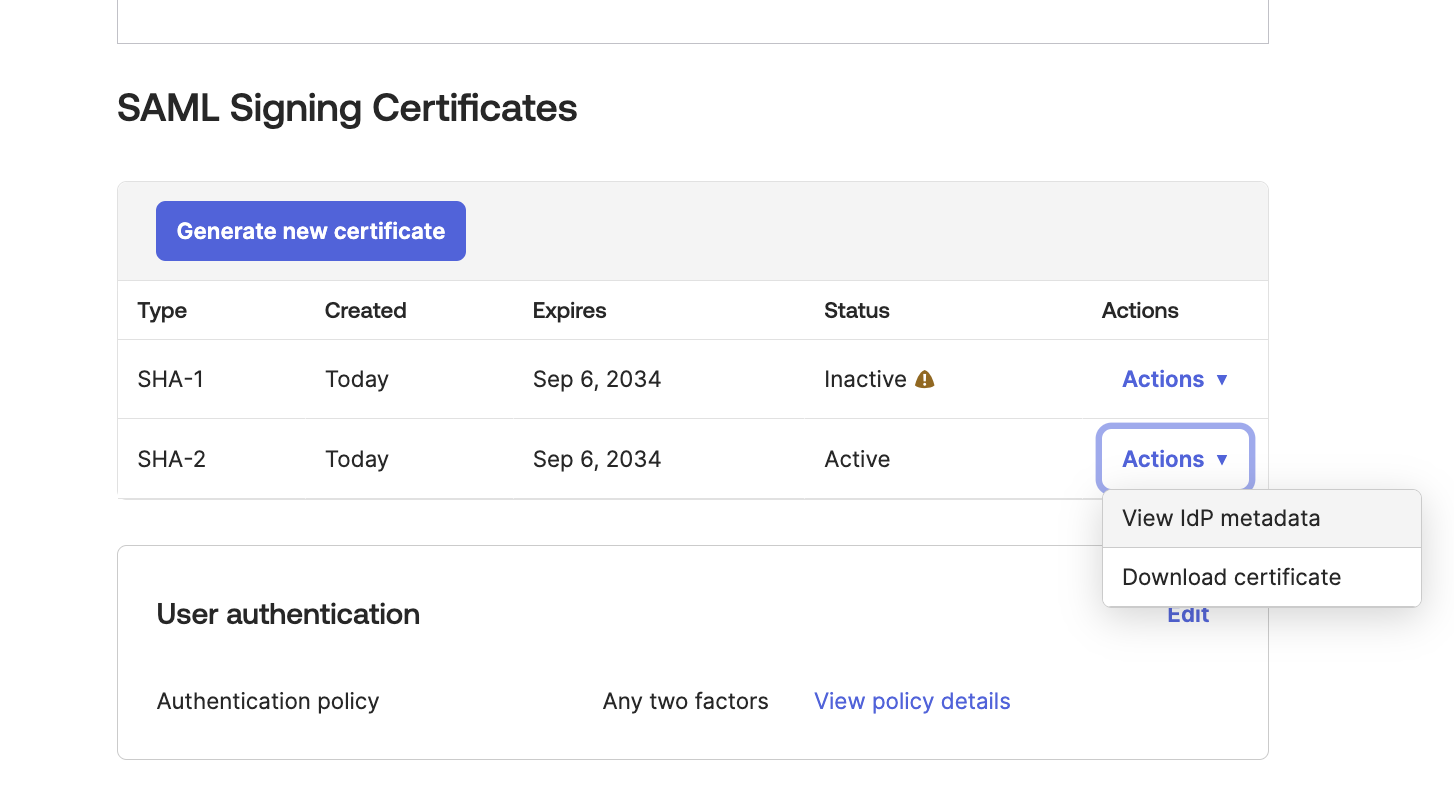
5. Grab your IdP metadata
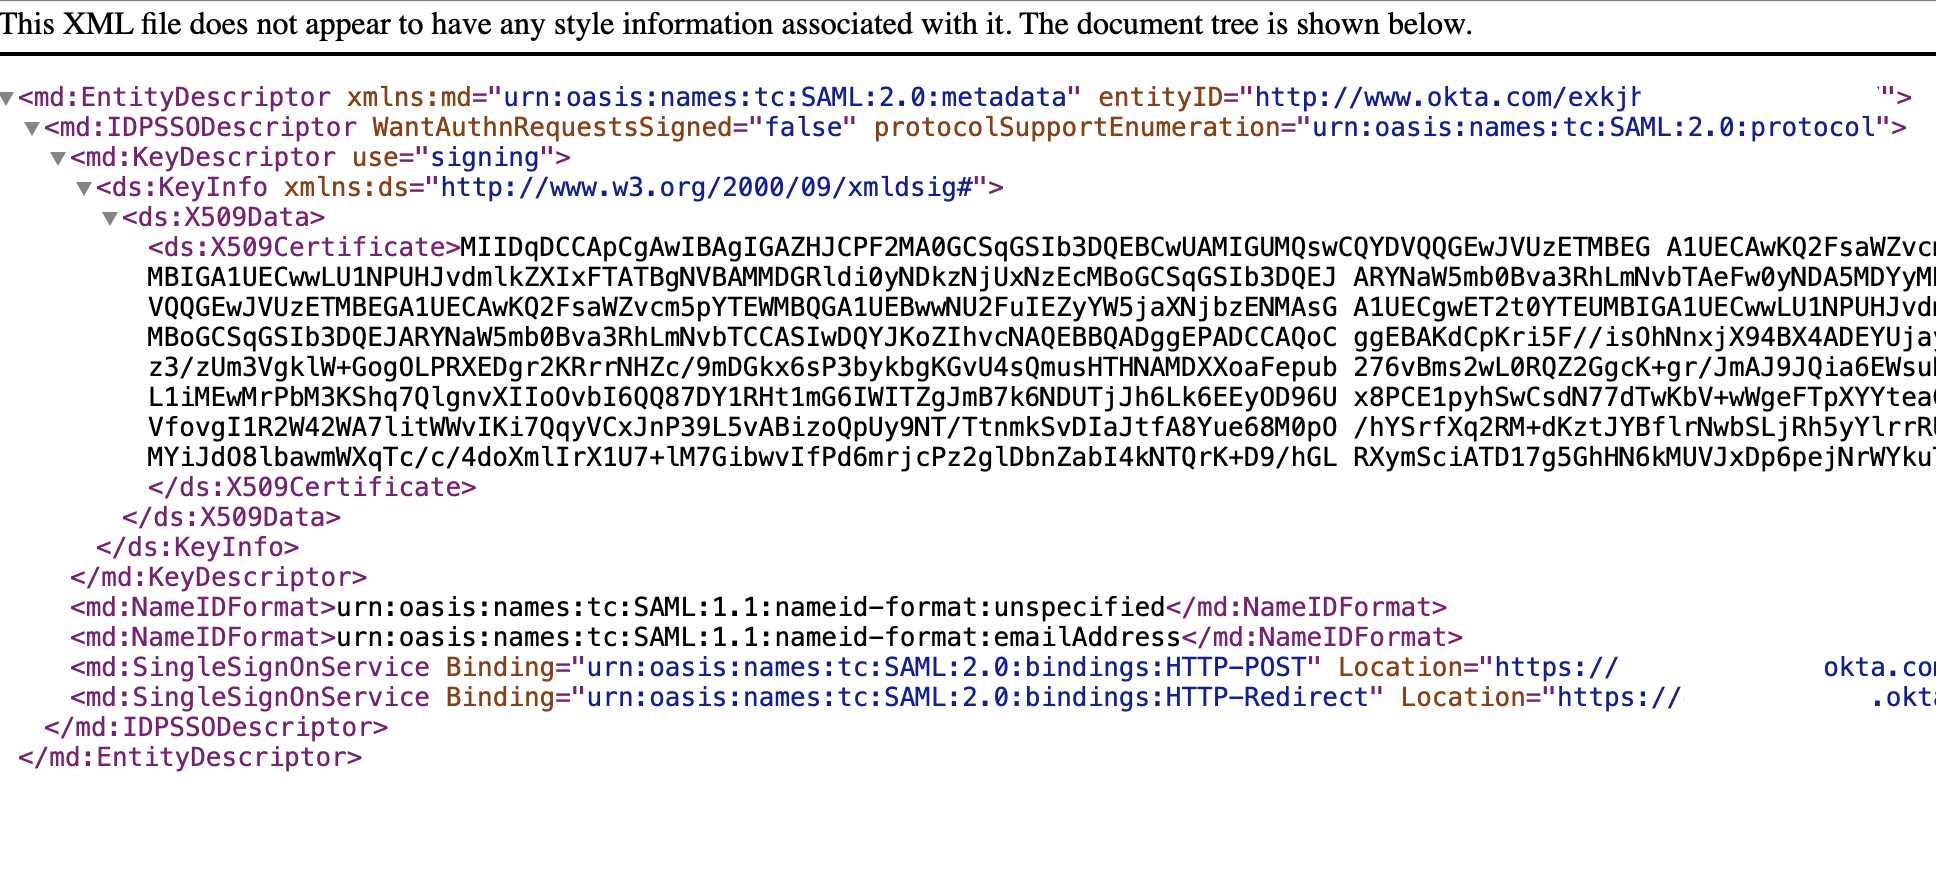
6. Your IdP metadata should look something like this:
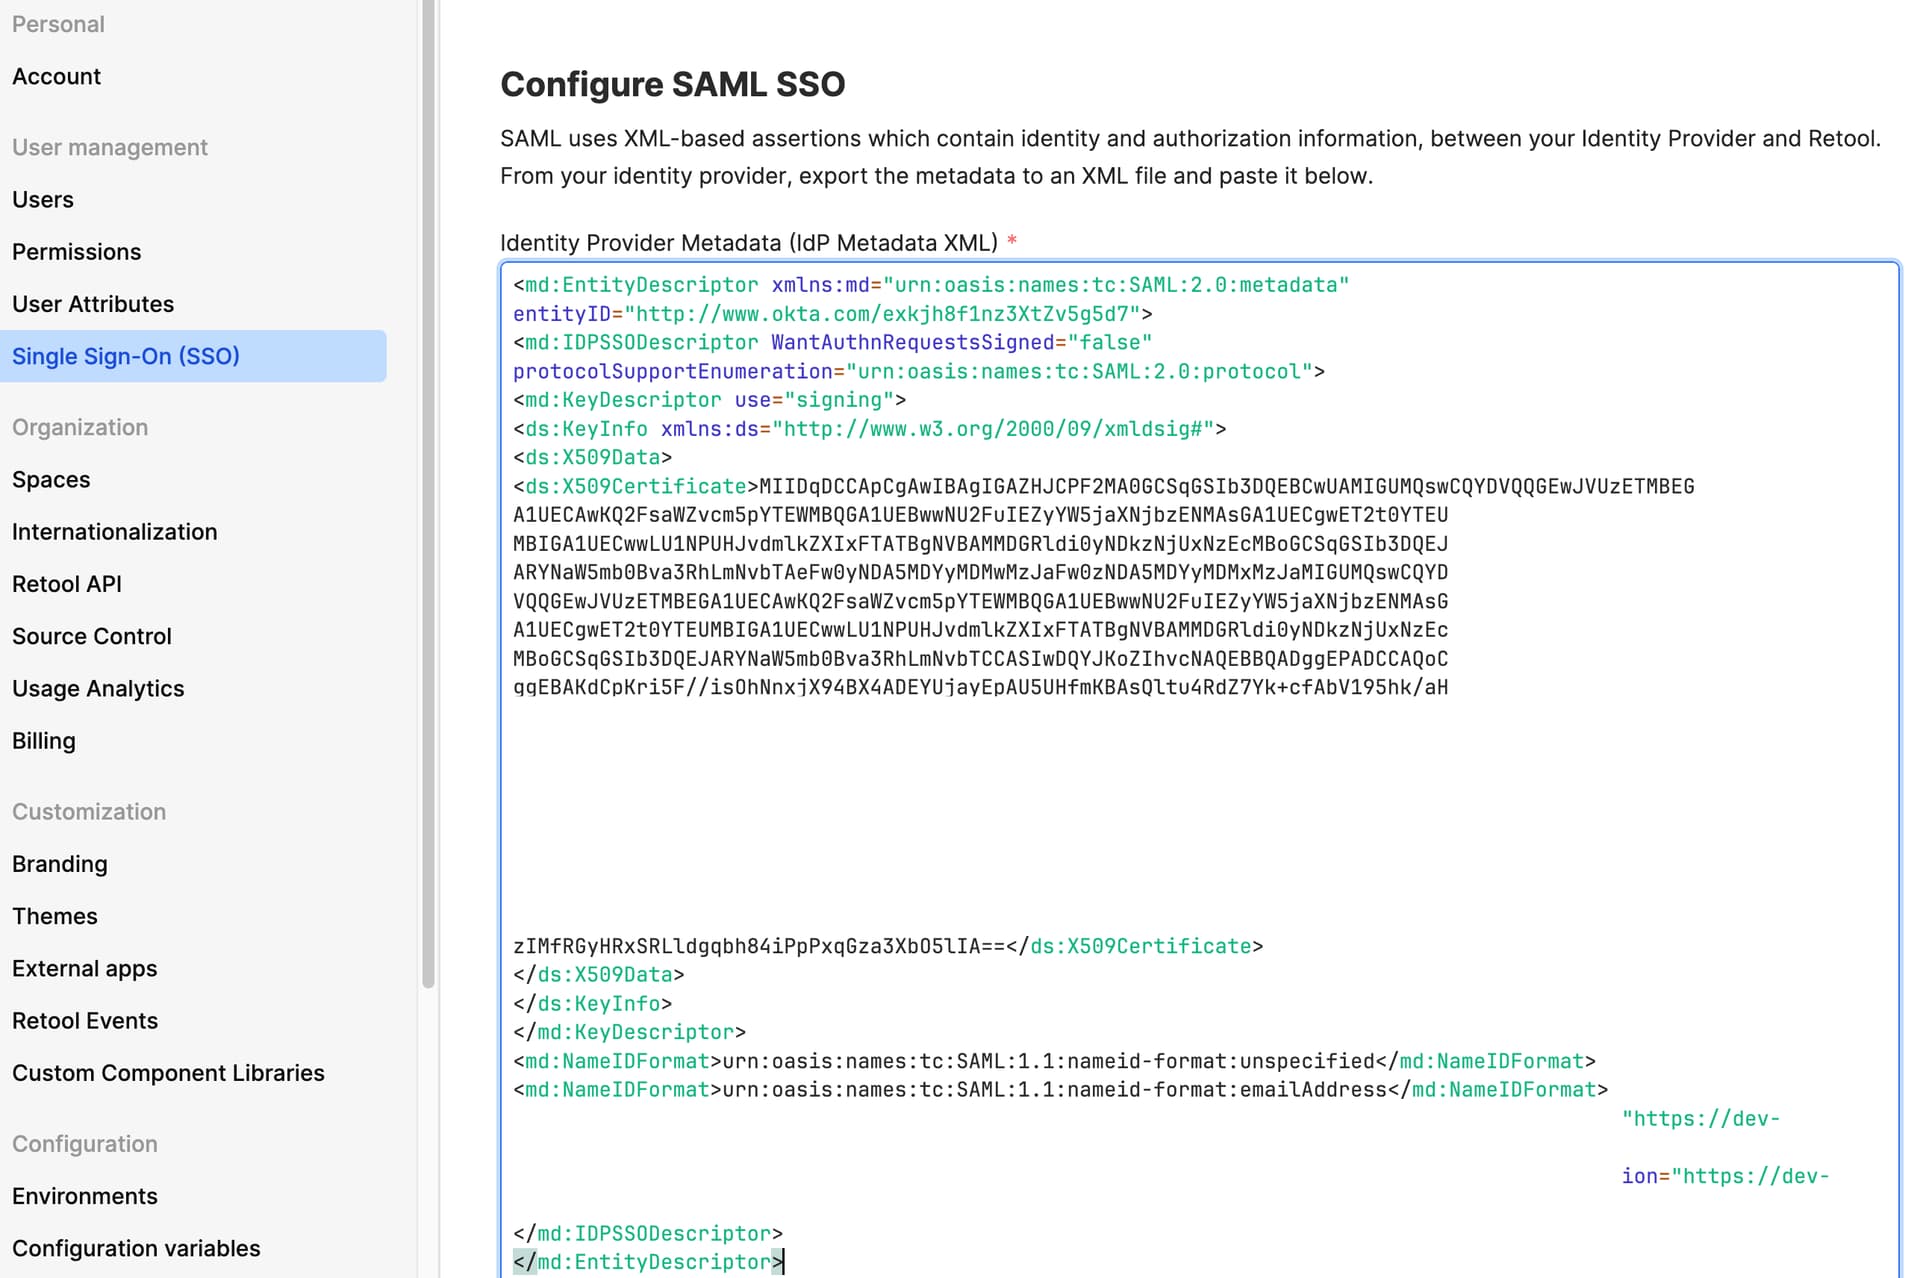
7. Insert this into Retool: Settings > SSO > SAML
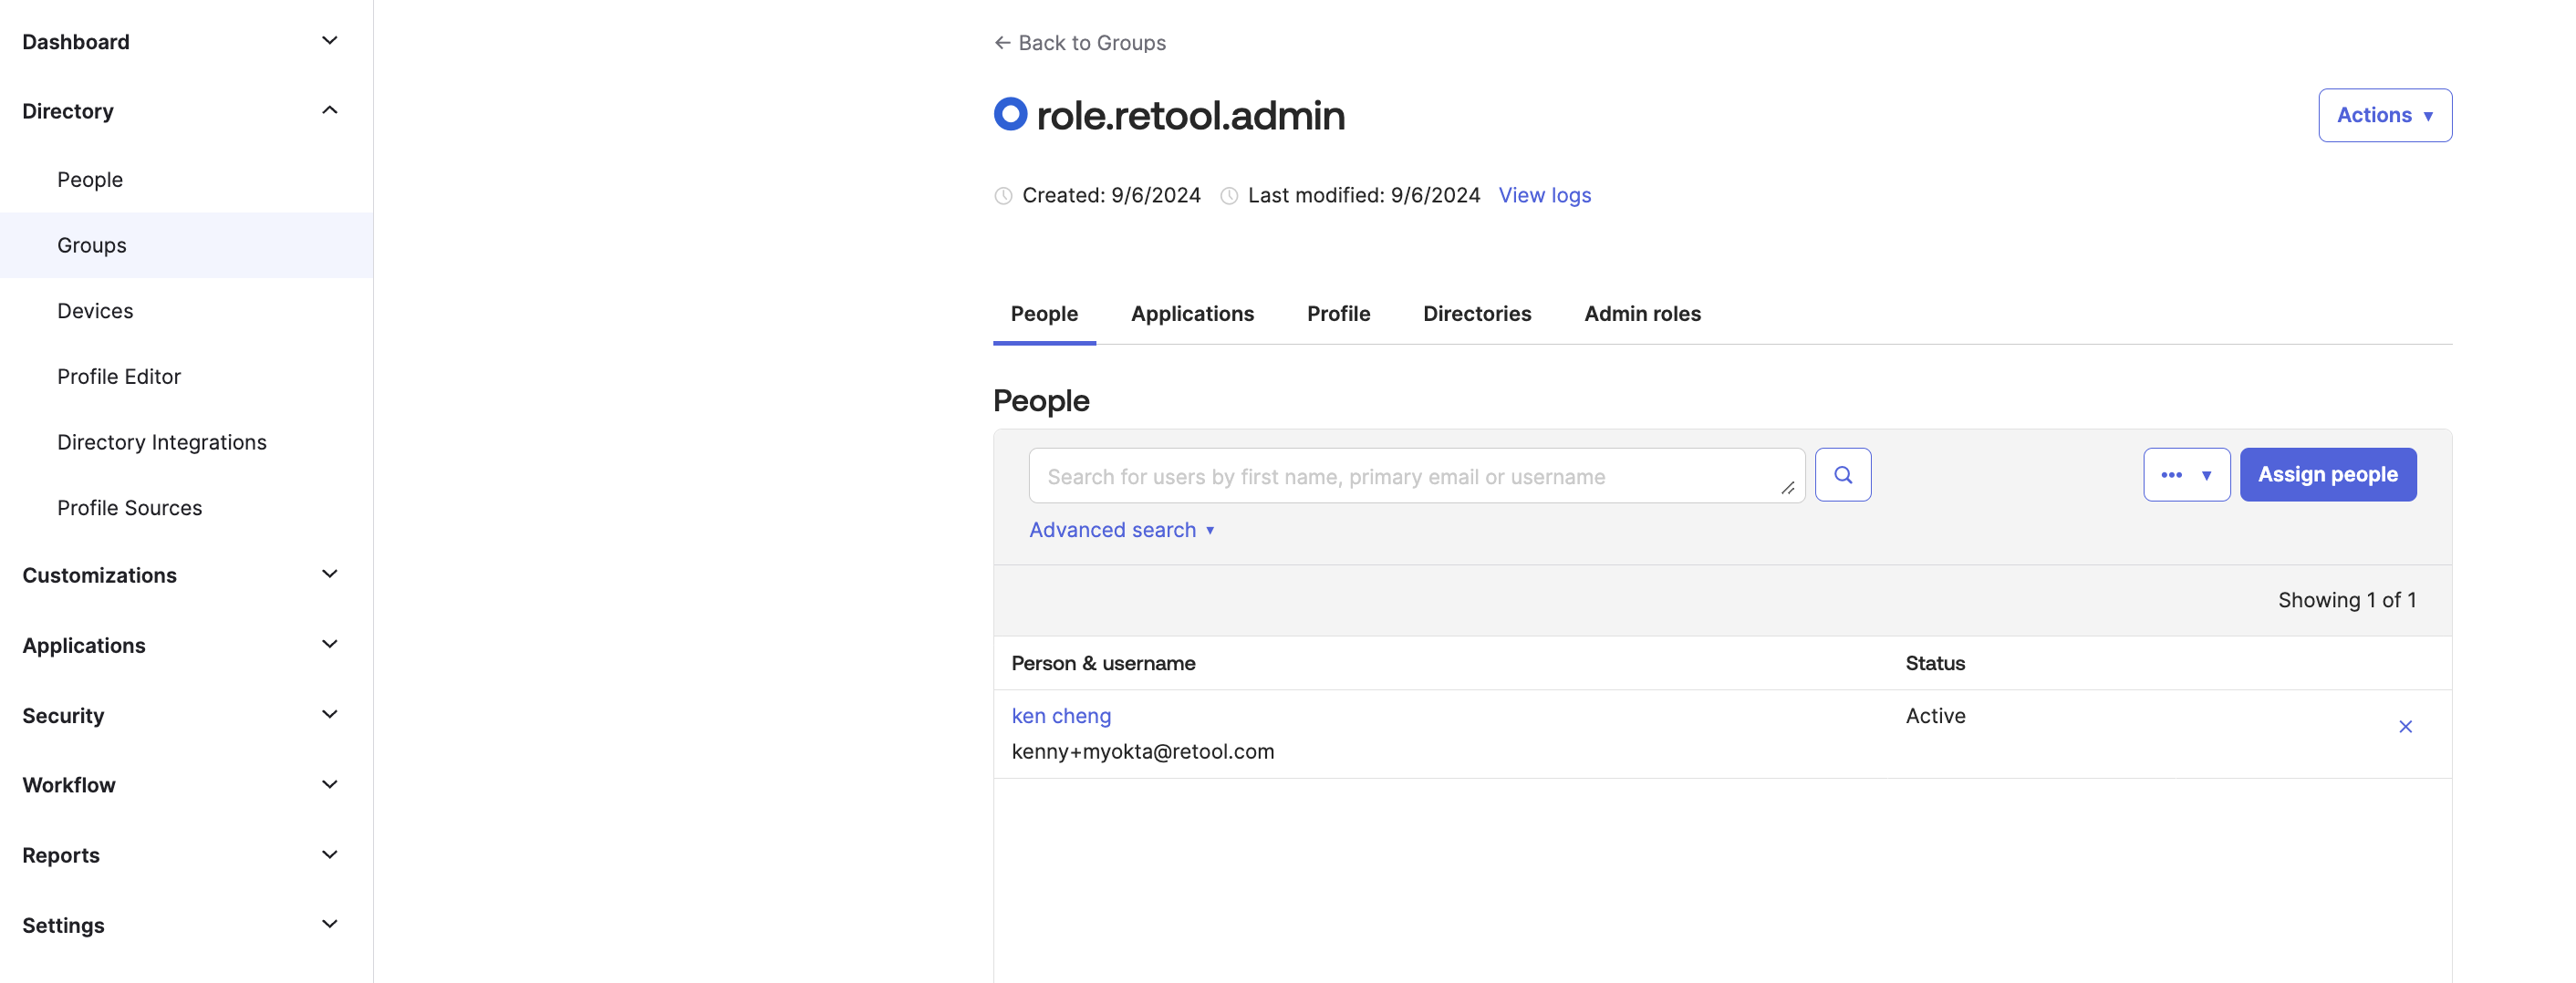
Setting up Role Mapping:
1. Create a Group:
- In this example I created role.retool.admin group and assigned my user kenny+myokta@retool.com to the Group: 'role.retool.admin'
2. Assign your Okta Application to your User
- Assigning an Okta application to a user means you're granting that user access to a specific application that is integrated with your Okta identity management system.
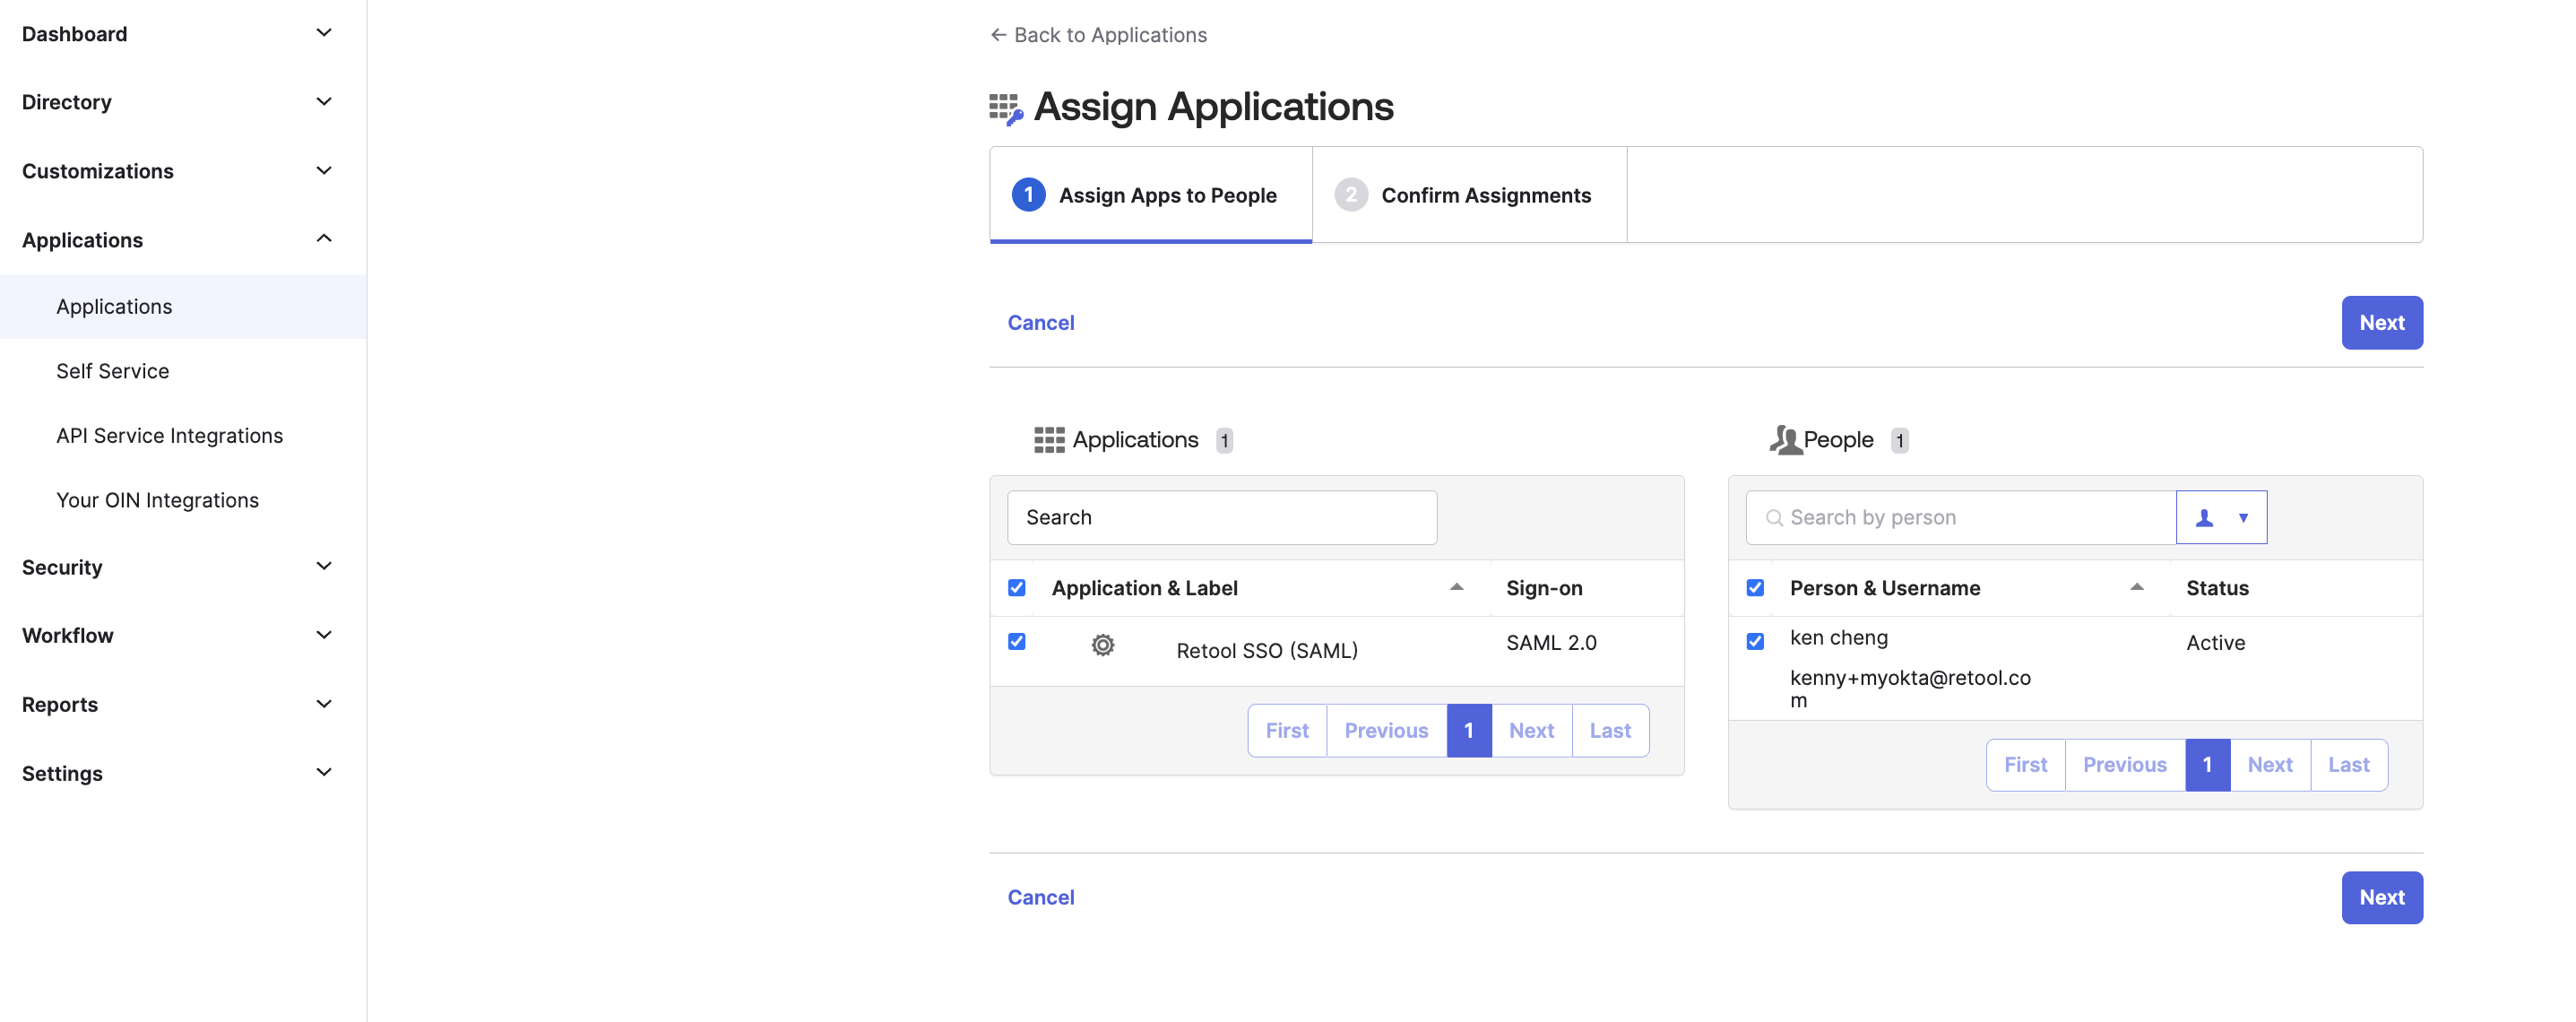
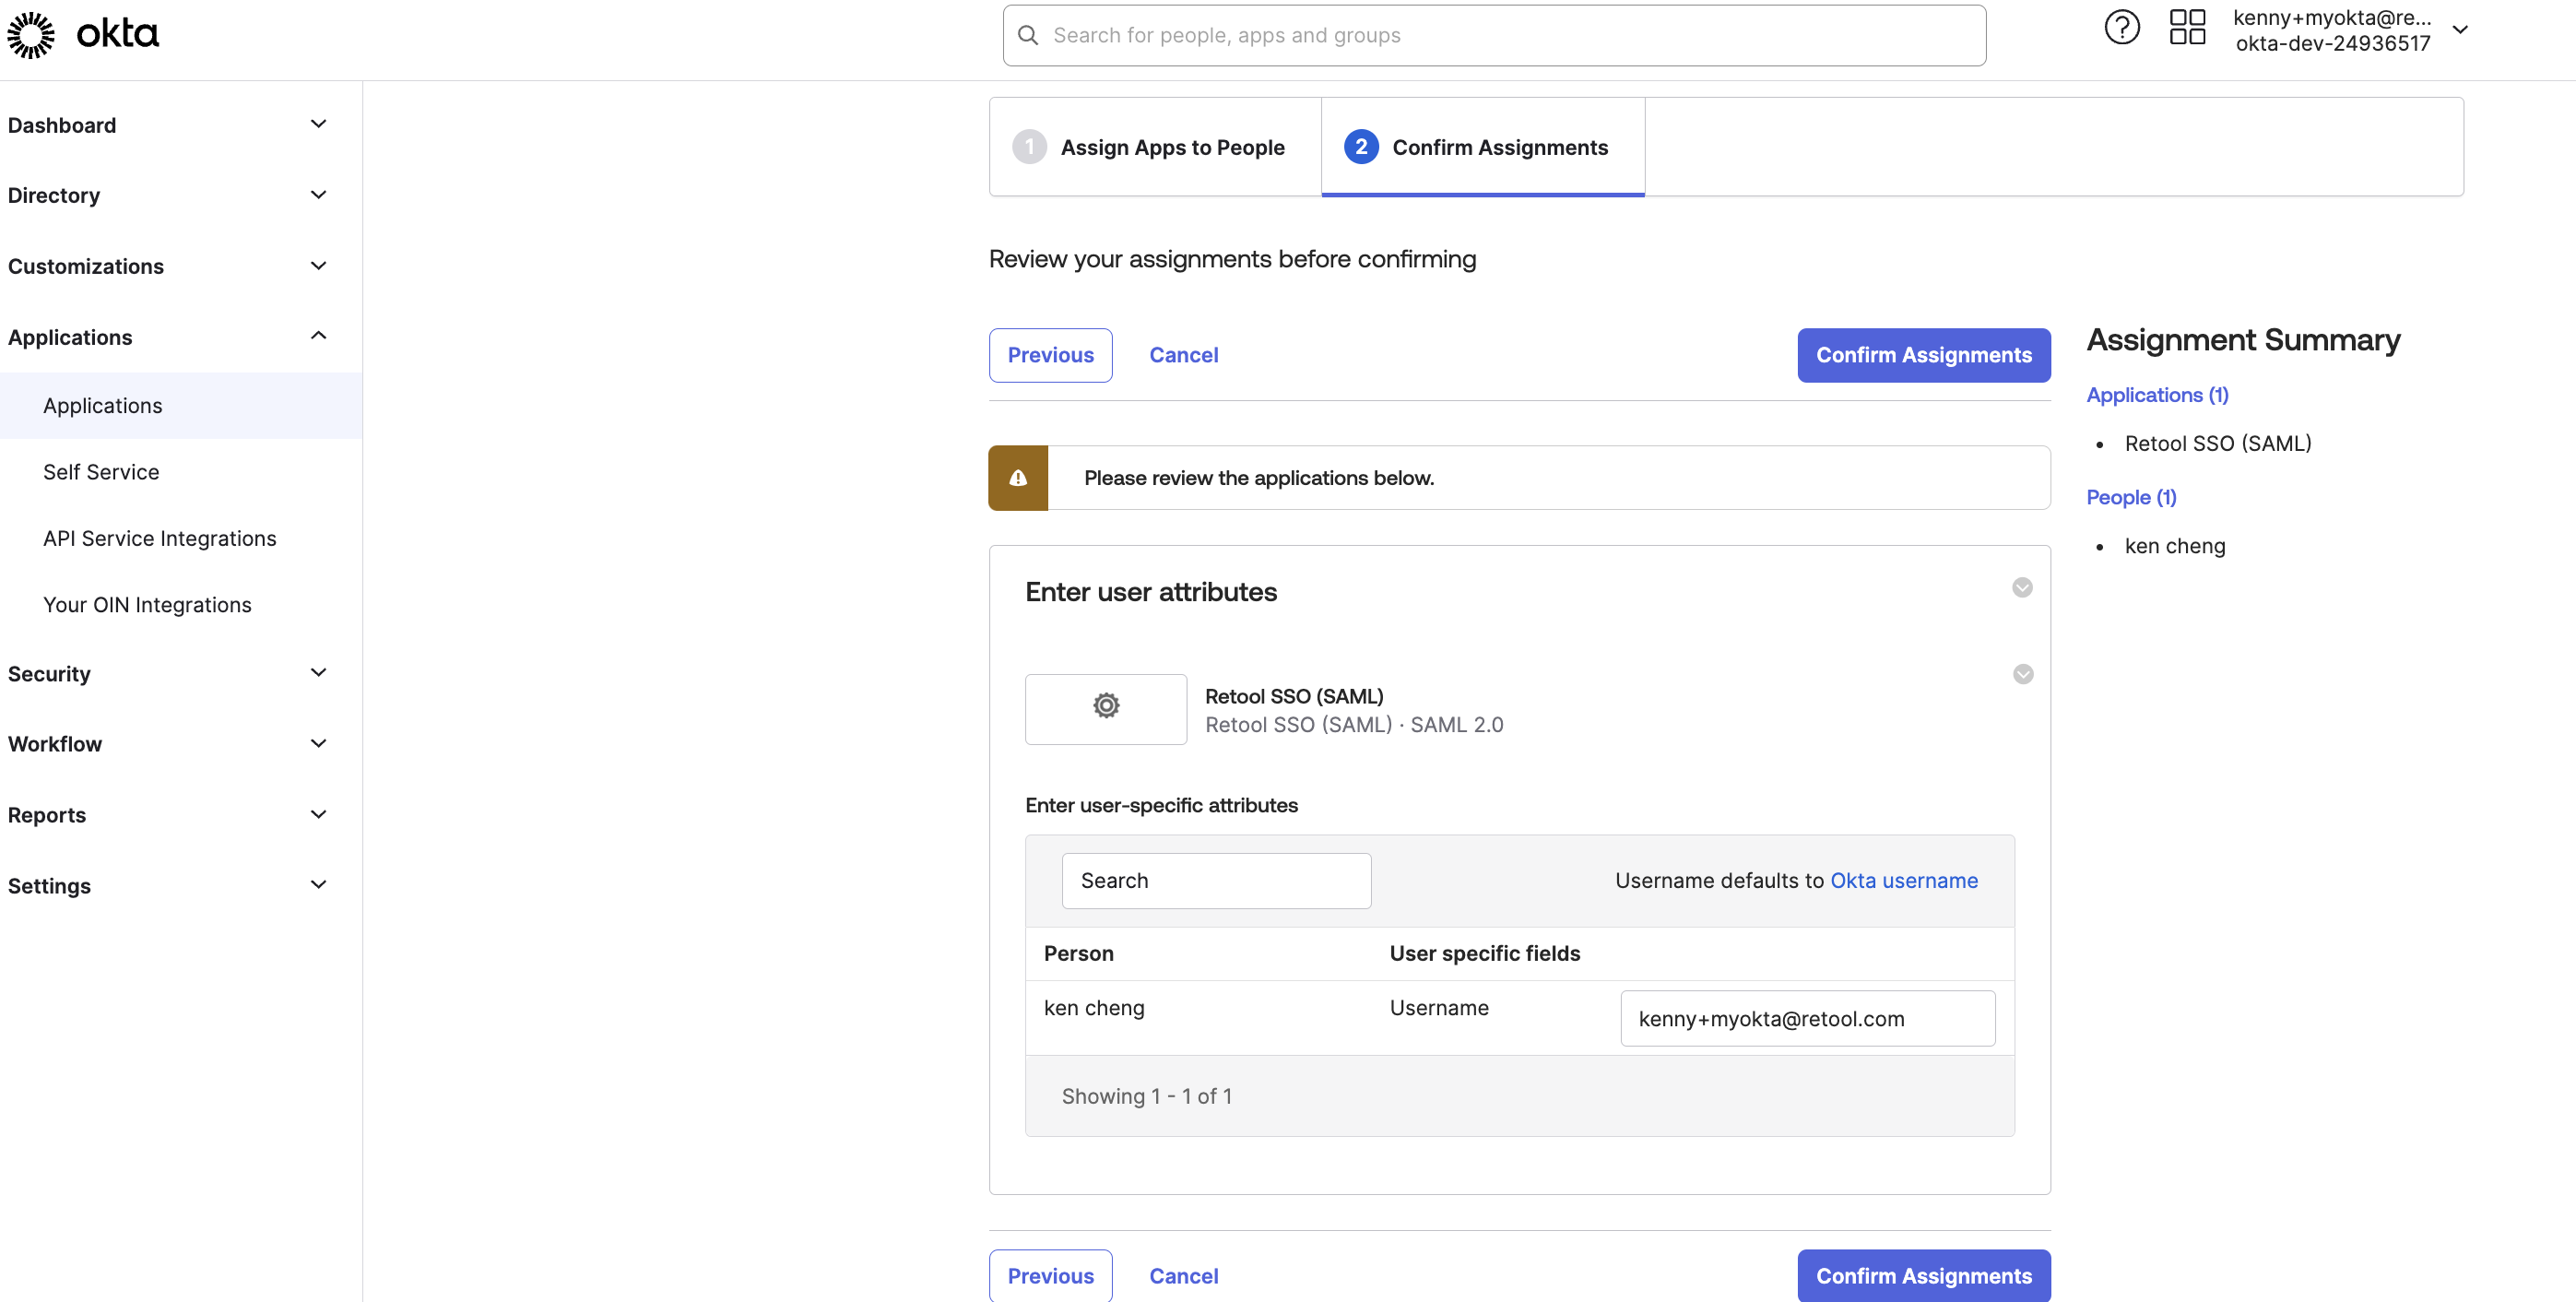
3. Confirm the Assignment to the User
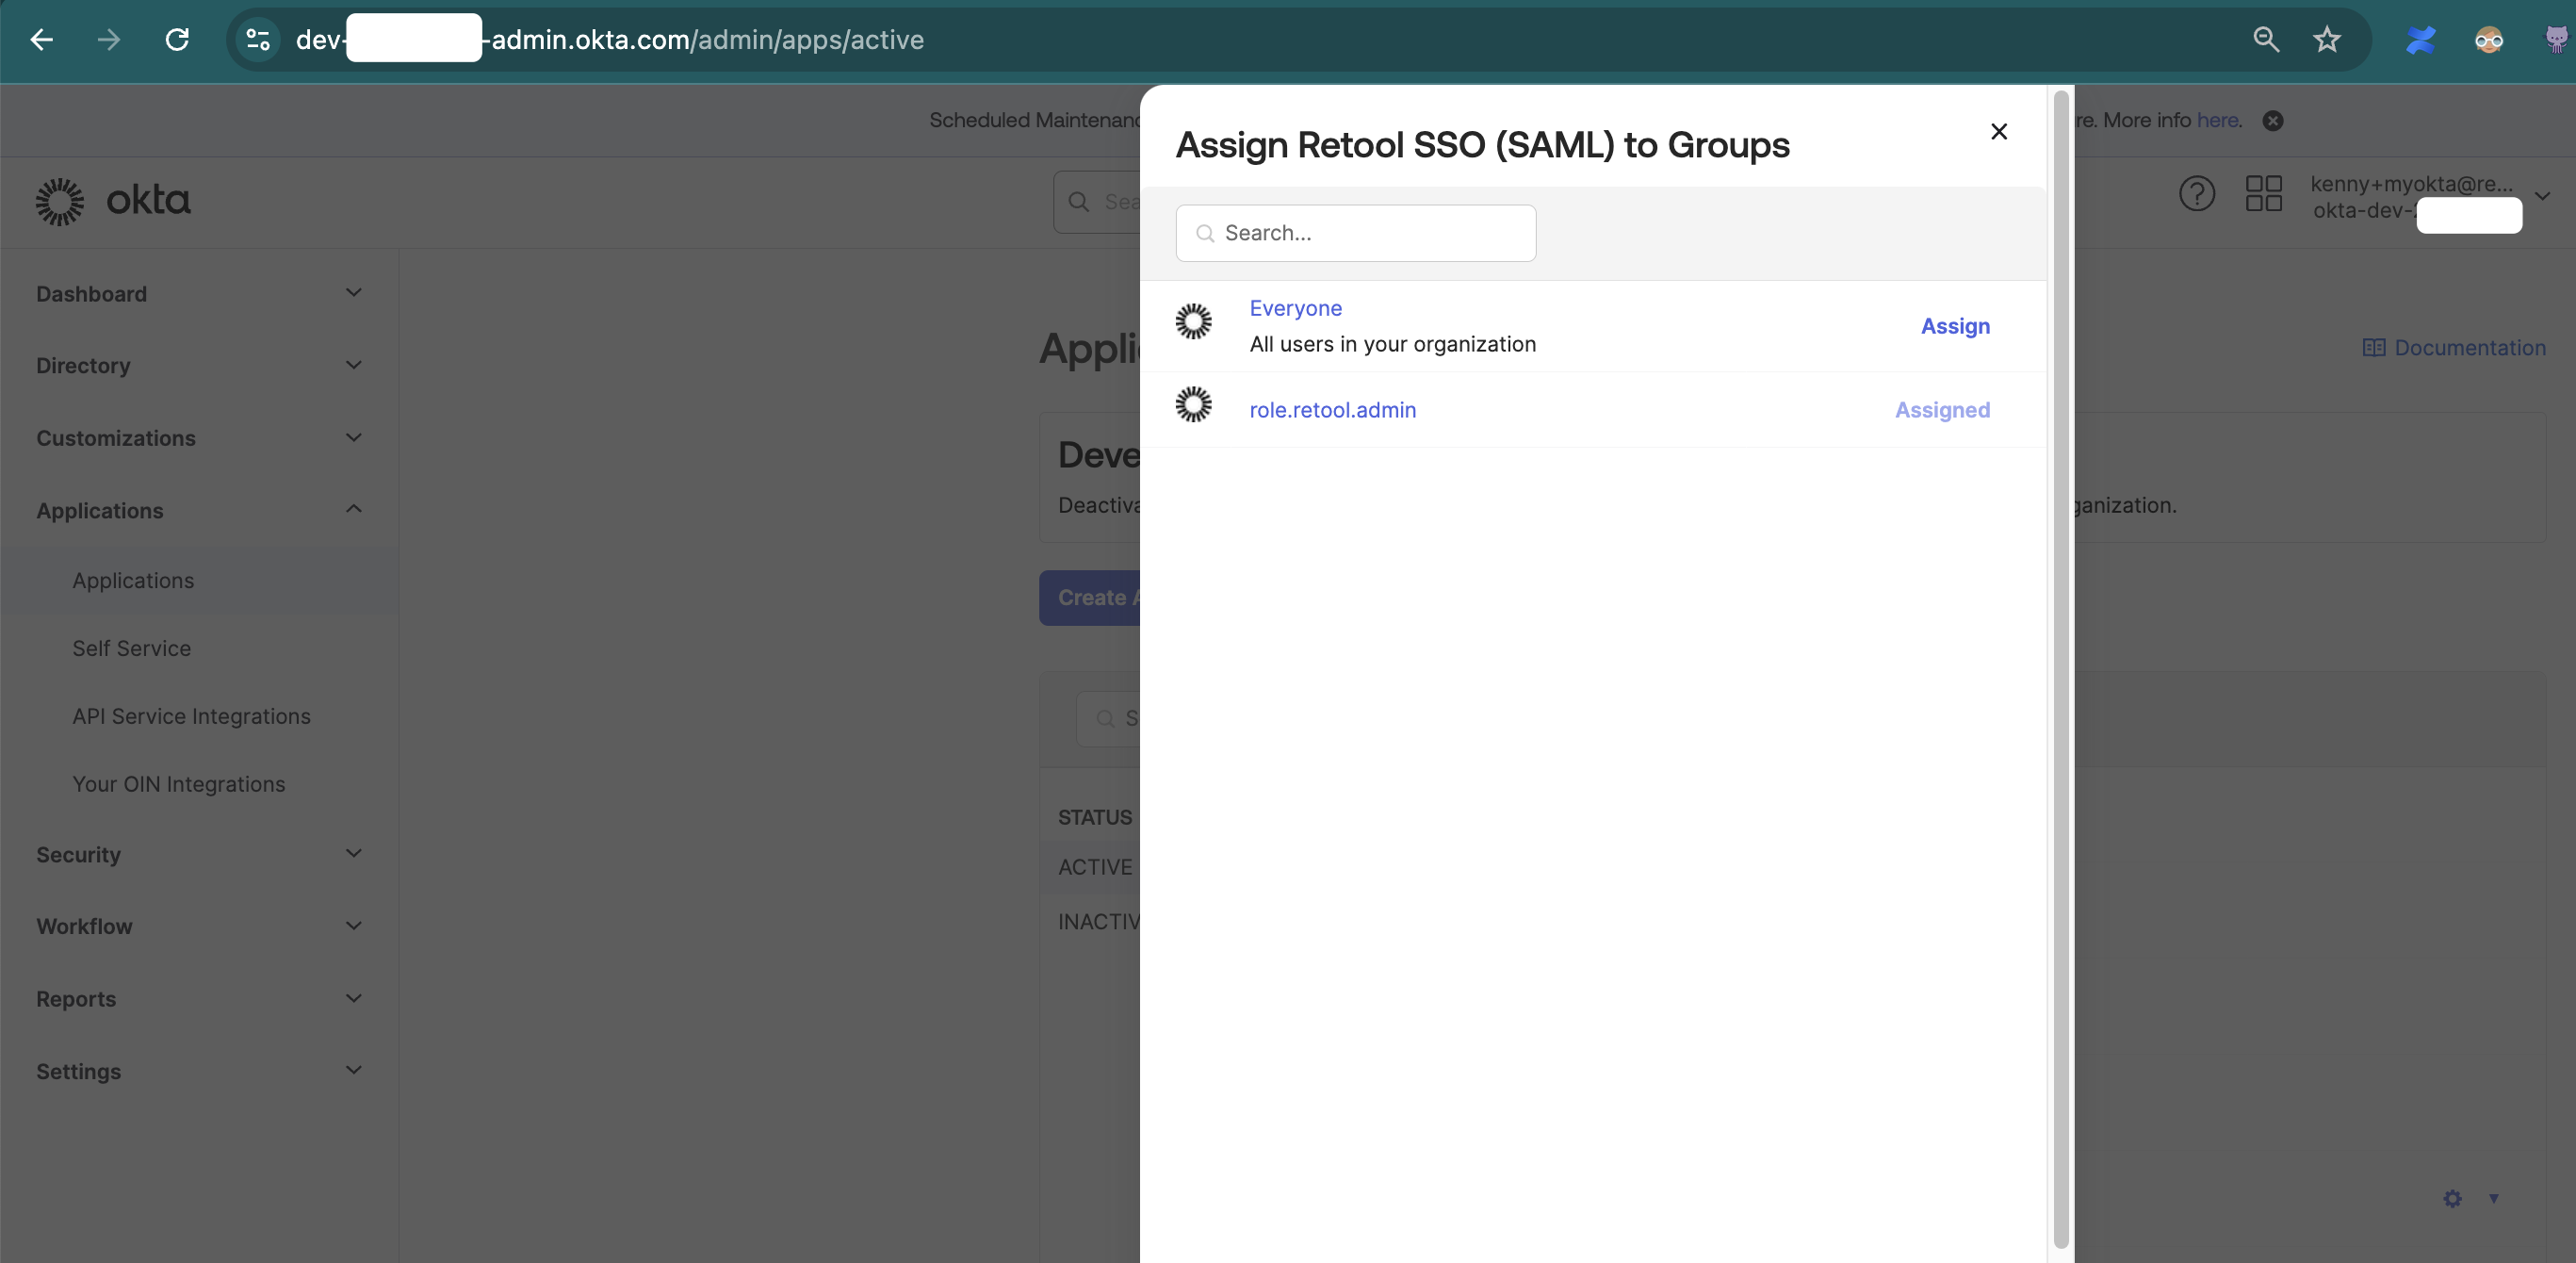
4. Assign your Okta Application to your Group
- Here I'm assigning Retool Application('Retool SSO (SAML)') to my Group('role.retool.admin')
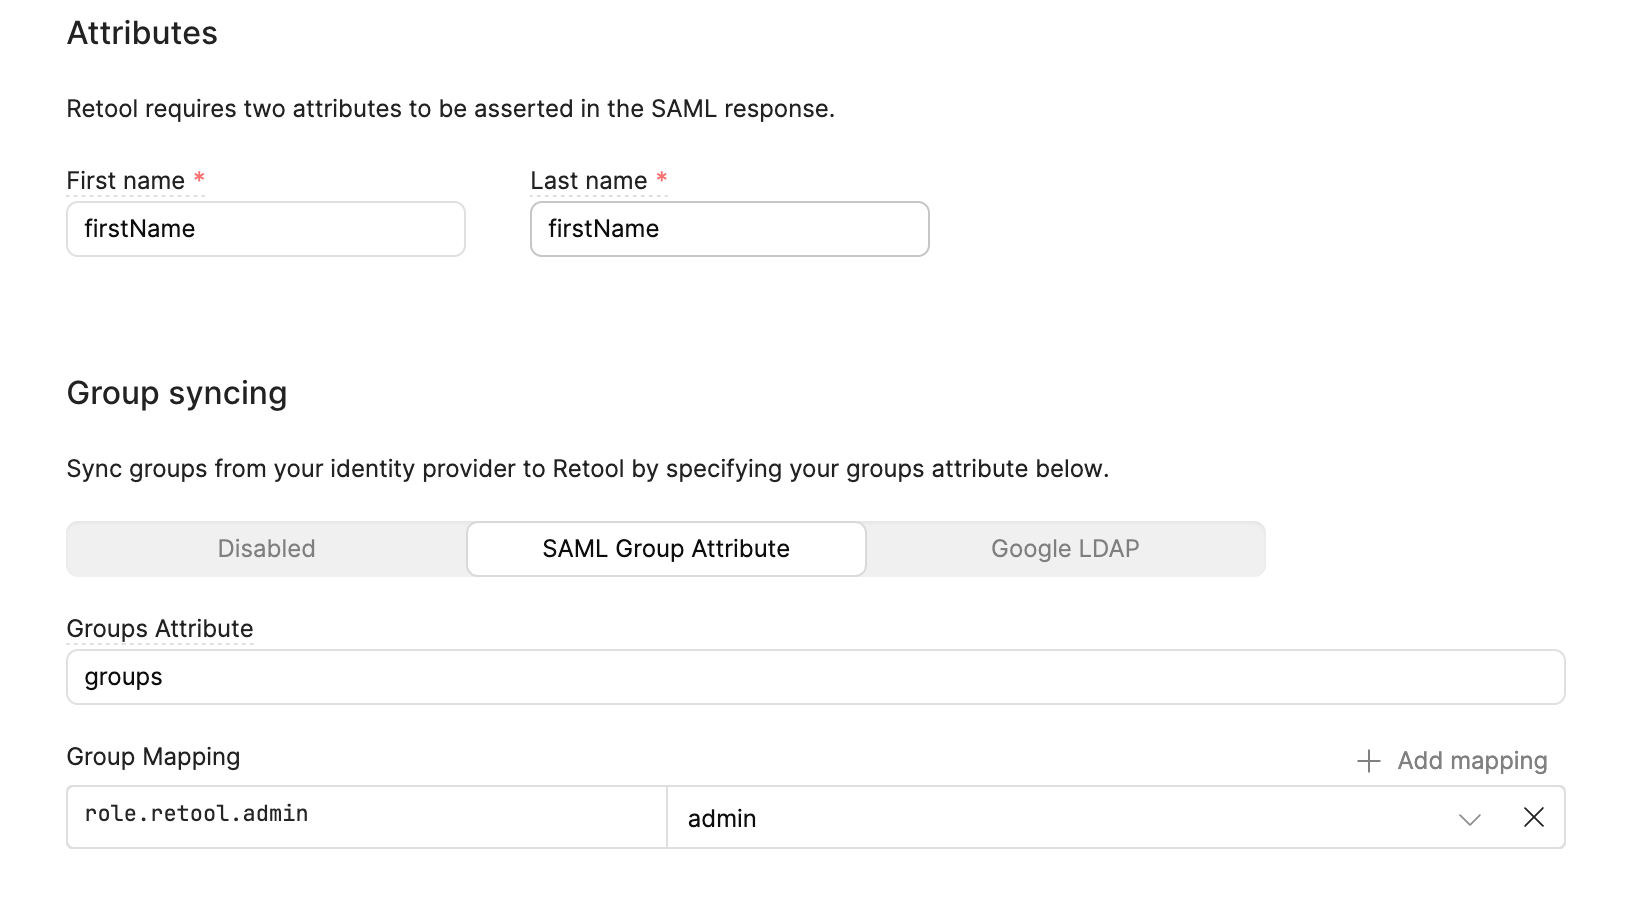
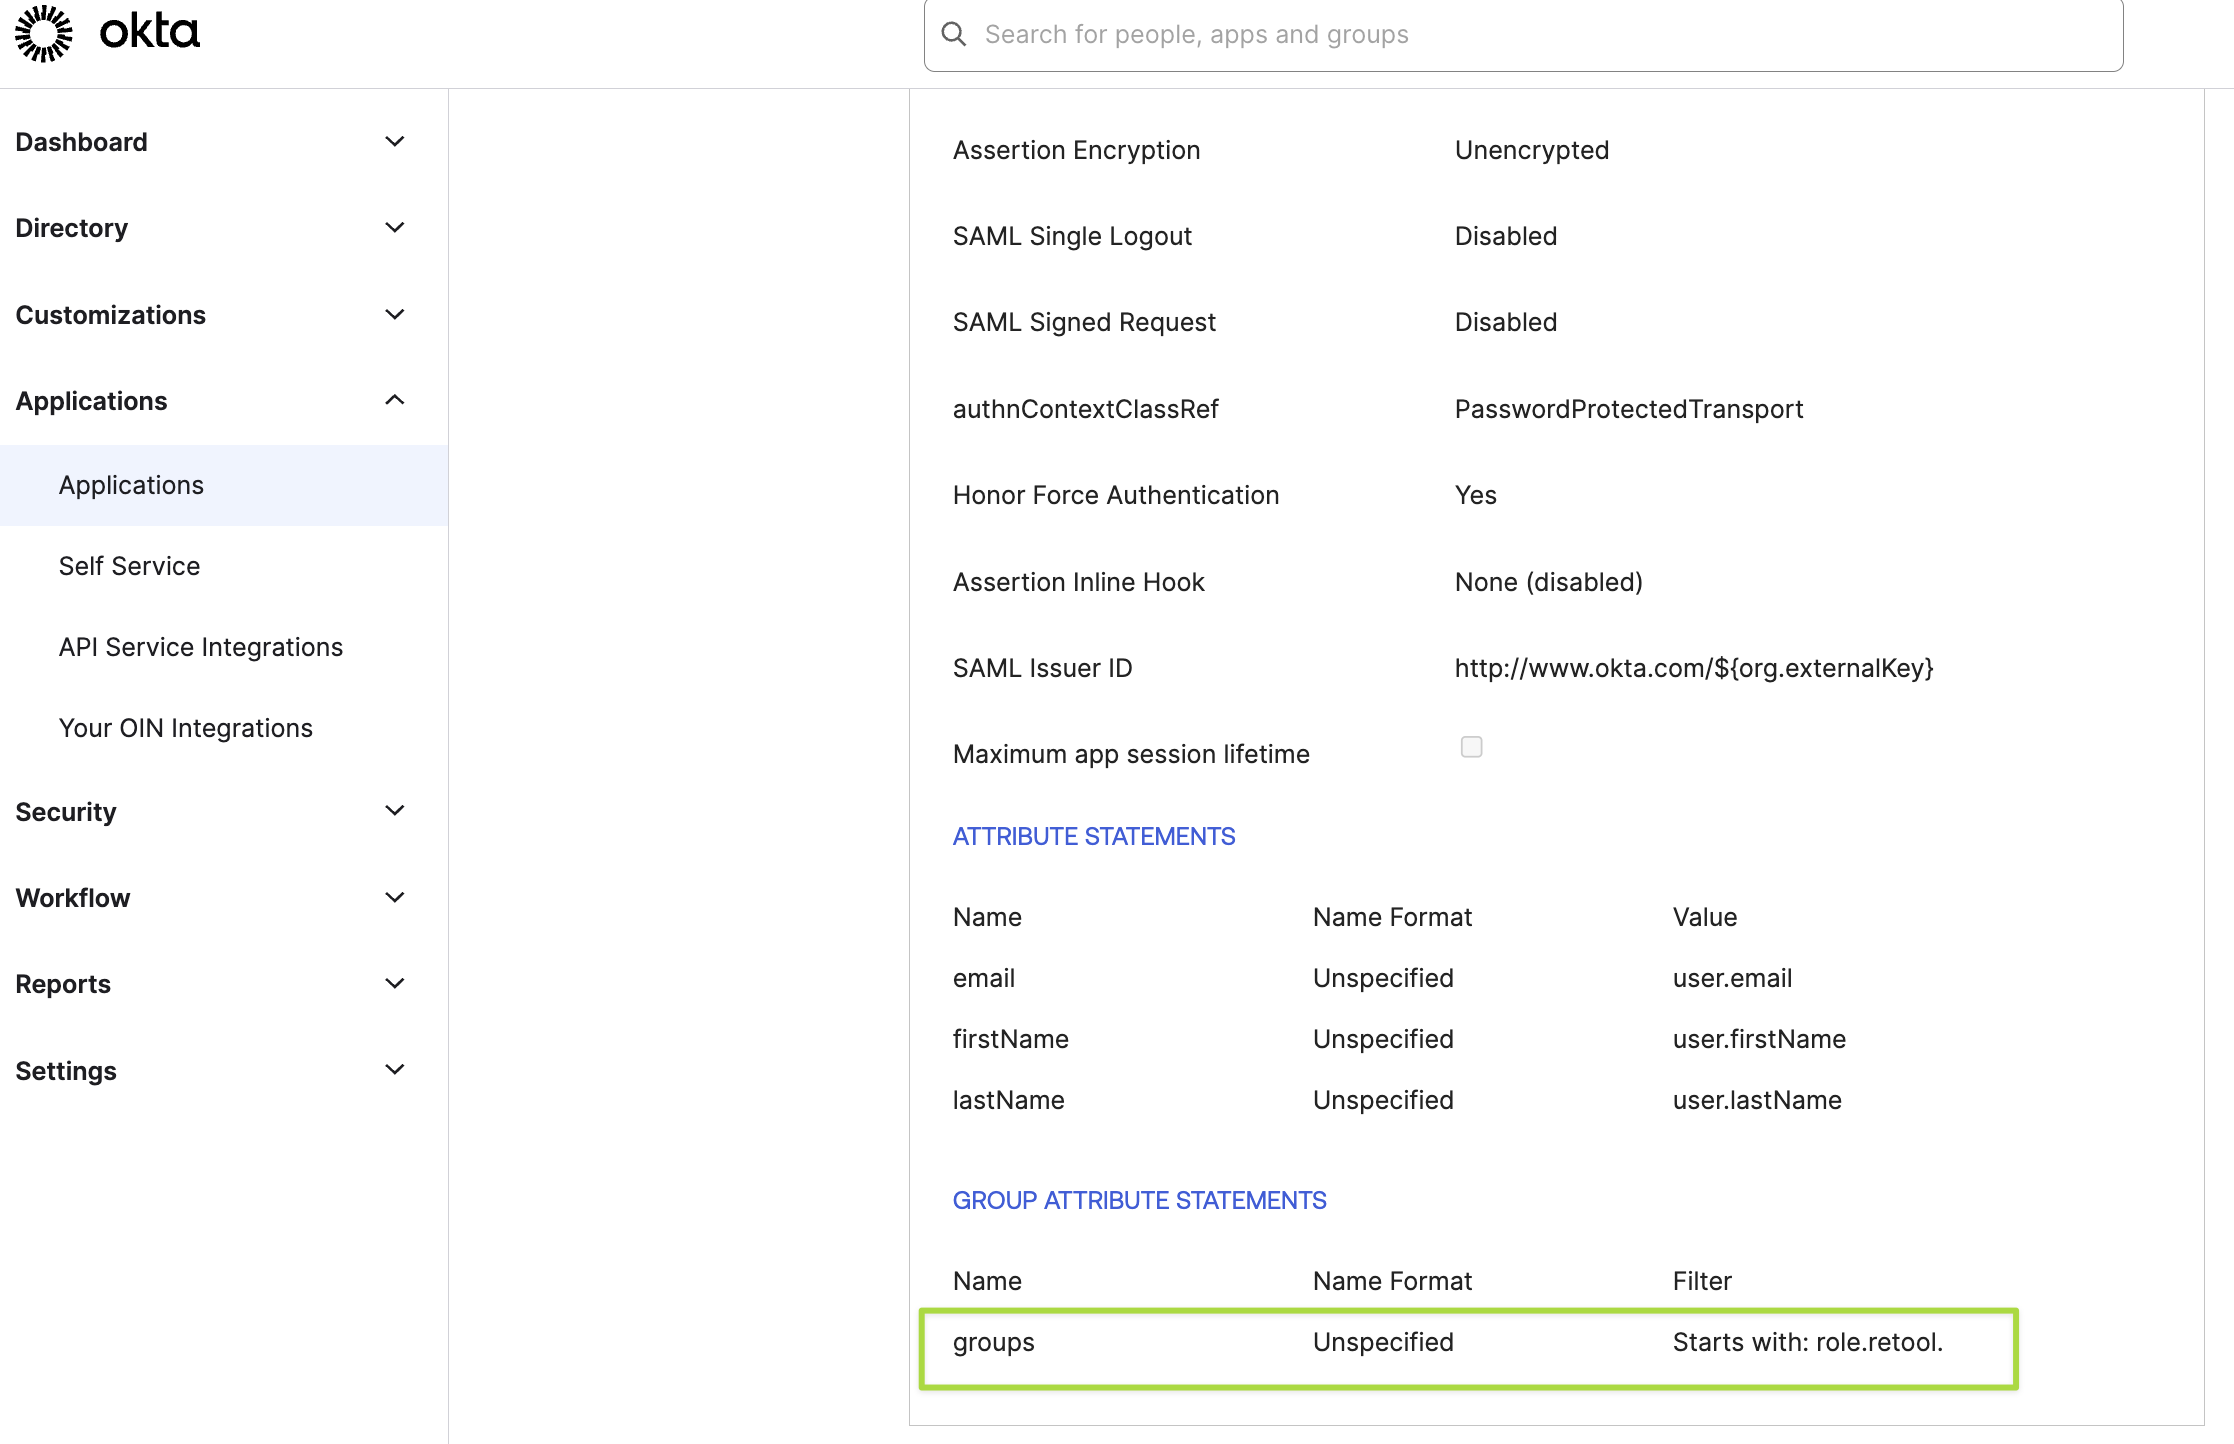
5. Set your Okta Application's Group Attribute with your Group Name
- From Okta Applications: click your Application's name and navigate to the 'General' tab.
- The 'ATTRIBUTE STATEMENTS' > 'Name' will be used in your Retool setup in the next step
6. Set the Group mapping in Retool to match your Groups in Retool