If you're using SAML via Okta for authentication in your Spaces, here are some key practices to help you configure and scale SSO effectively:
SSO and Spaces are available on the Enterprise plan.
1. Copying SSO settings across Spaces? Don't forget this step.
When creating a new Space and copying SAML SSO settings from your admin Space:
- You can copy and reuse the existing SSO configuration in your admin Space.
- However, you must go into Okta and add a new “Requestable SSO URL” for the new Space.
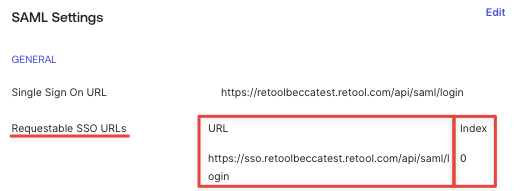
Why it matters: Without the additional SSO URL, Okta will redirect users back to the original (admin) Space when they try to log in.
Where to set it:
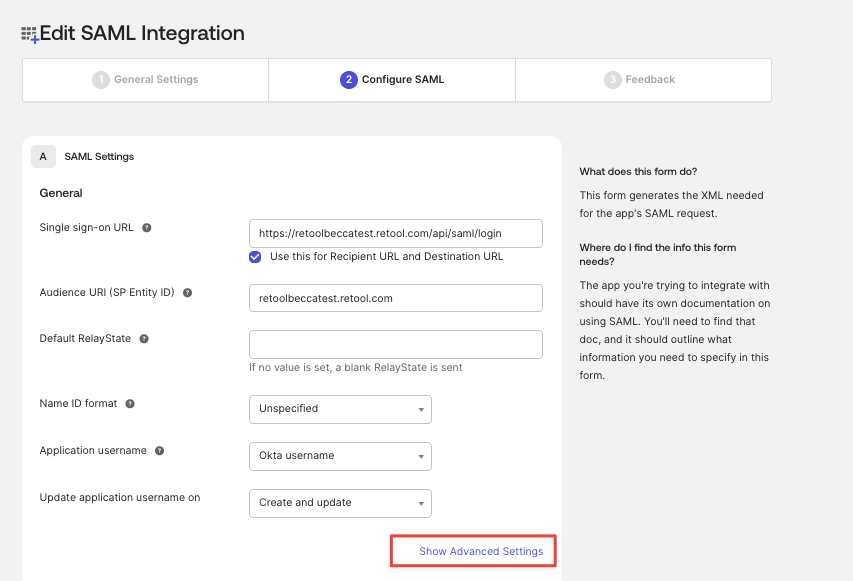
In your SAML app in Okta, go to the General tab and add a new Requestable SSO URL for each additional Space through SAML Settings > Edit > Configure SAML > Show Advanced Settings
See video here: Okta SAML x Spaces | Loom
2. Different Spaces, Different Requirements? Use Separate SAML Apps
If your new Space needs different:
- User roles or permissions
- Mapped groups
- Attribute configurations
It’s best to create a dedicated SAML application in Okta rather than reusing the admin Space configuration. This allows more control and avoids conflicts with existing settings.
3. Avoid Lockouts: Test Before Finalizing
When configuring group or role mapping:
- Always test with a non-admin user.
- Or ensure that at least one admin can log in using a backup authentication method, in case something breaks during setup.
This ensures you don’t lose access during configuration changes- especially important when modifying group roles or permissions tied to admin rights.
By following these tips, you can extend Okta SAML to additional Spaces with confidence and avoid common pitfalls.