Hey @MiguelOrtiz! Especially once you are at the component level of styling by substring matching your id i.e. [id*="yourComponentId"], there are typically other distinctive ID or class attributes and/or their values that are also very far more distinct and obviously named than some of the more illogically named classes.
For context, below is an example of what I mean between the differences of a conventionally named id/class, and one that is non-conventional/illogical that would likely change with feature updates, etc. in Retool:
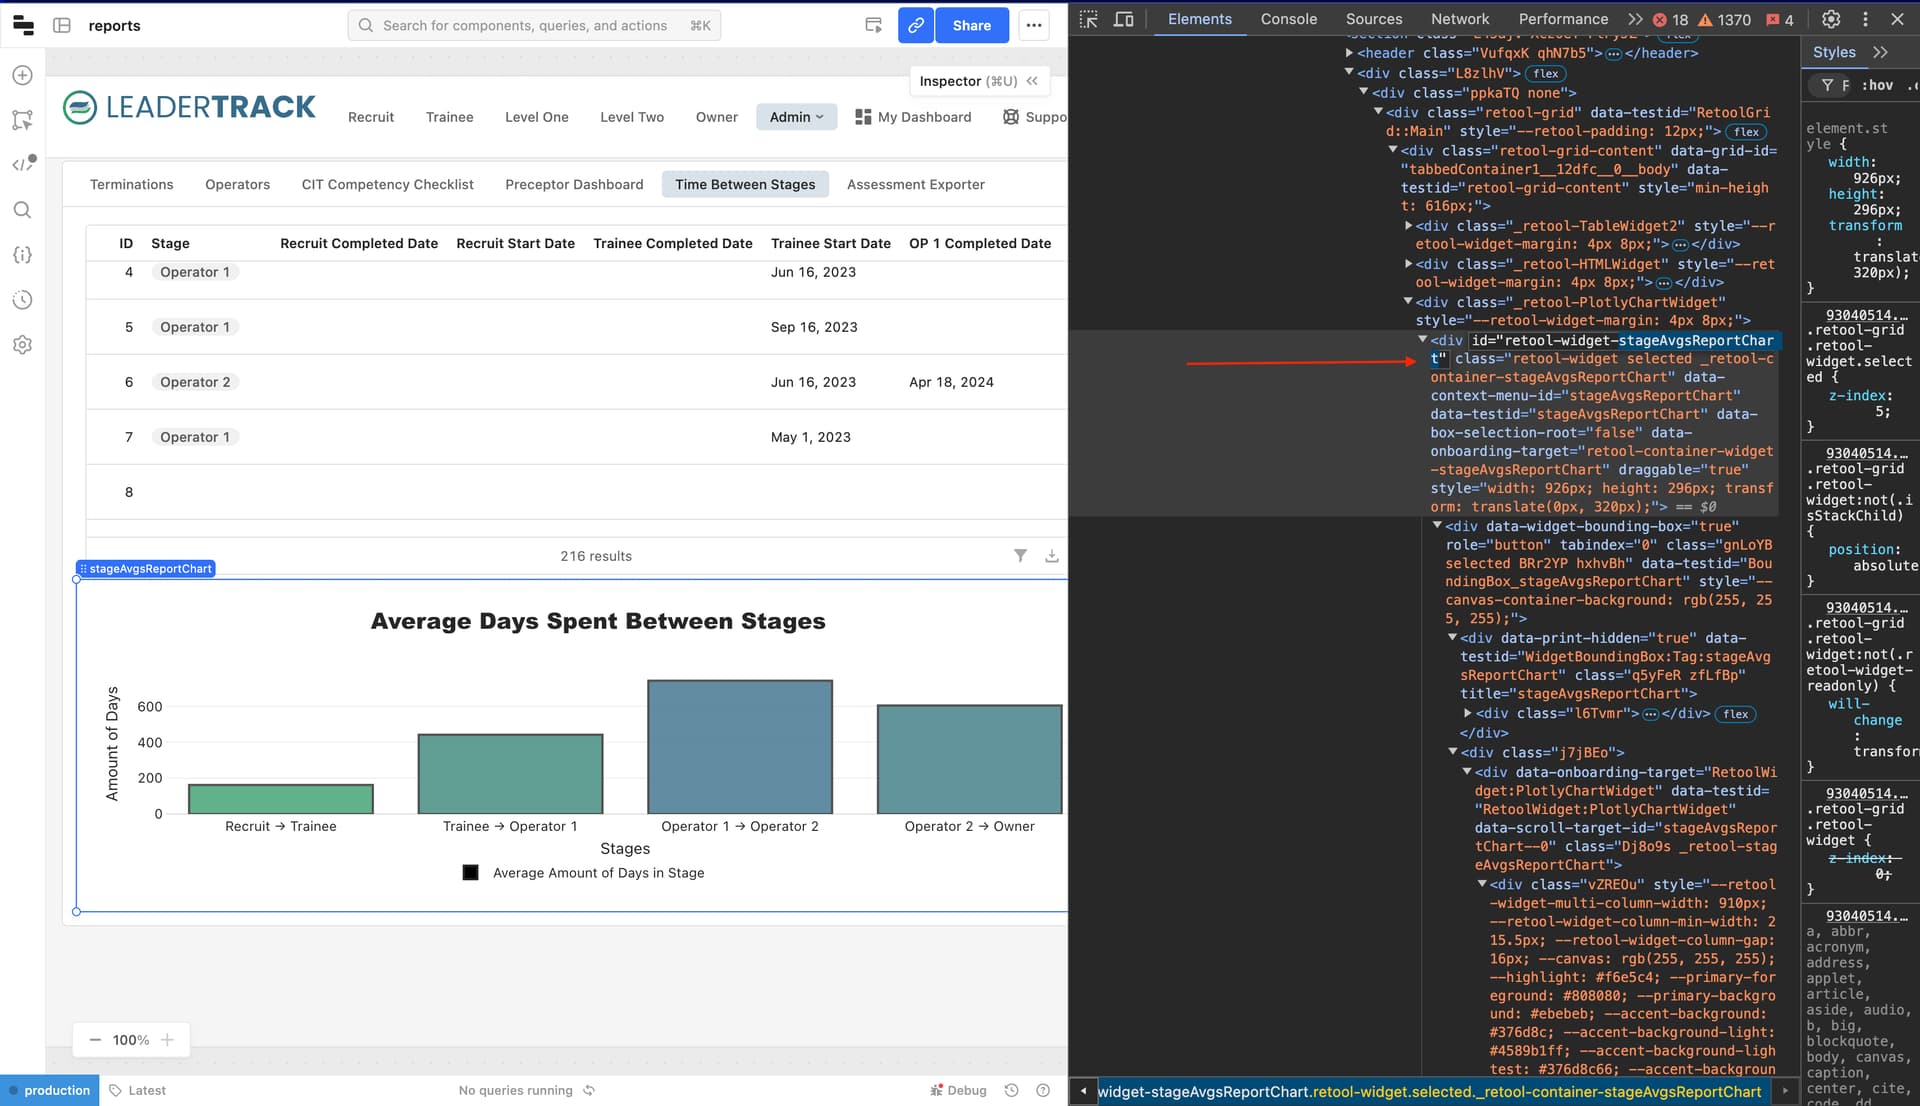
Conventionally named id which, in this case, is also the component ID I am targeting. You can see that I named this component stageAvgsReportChart:
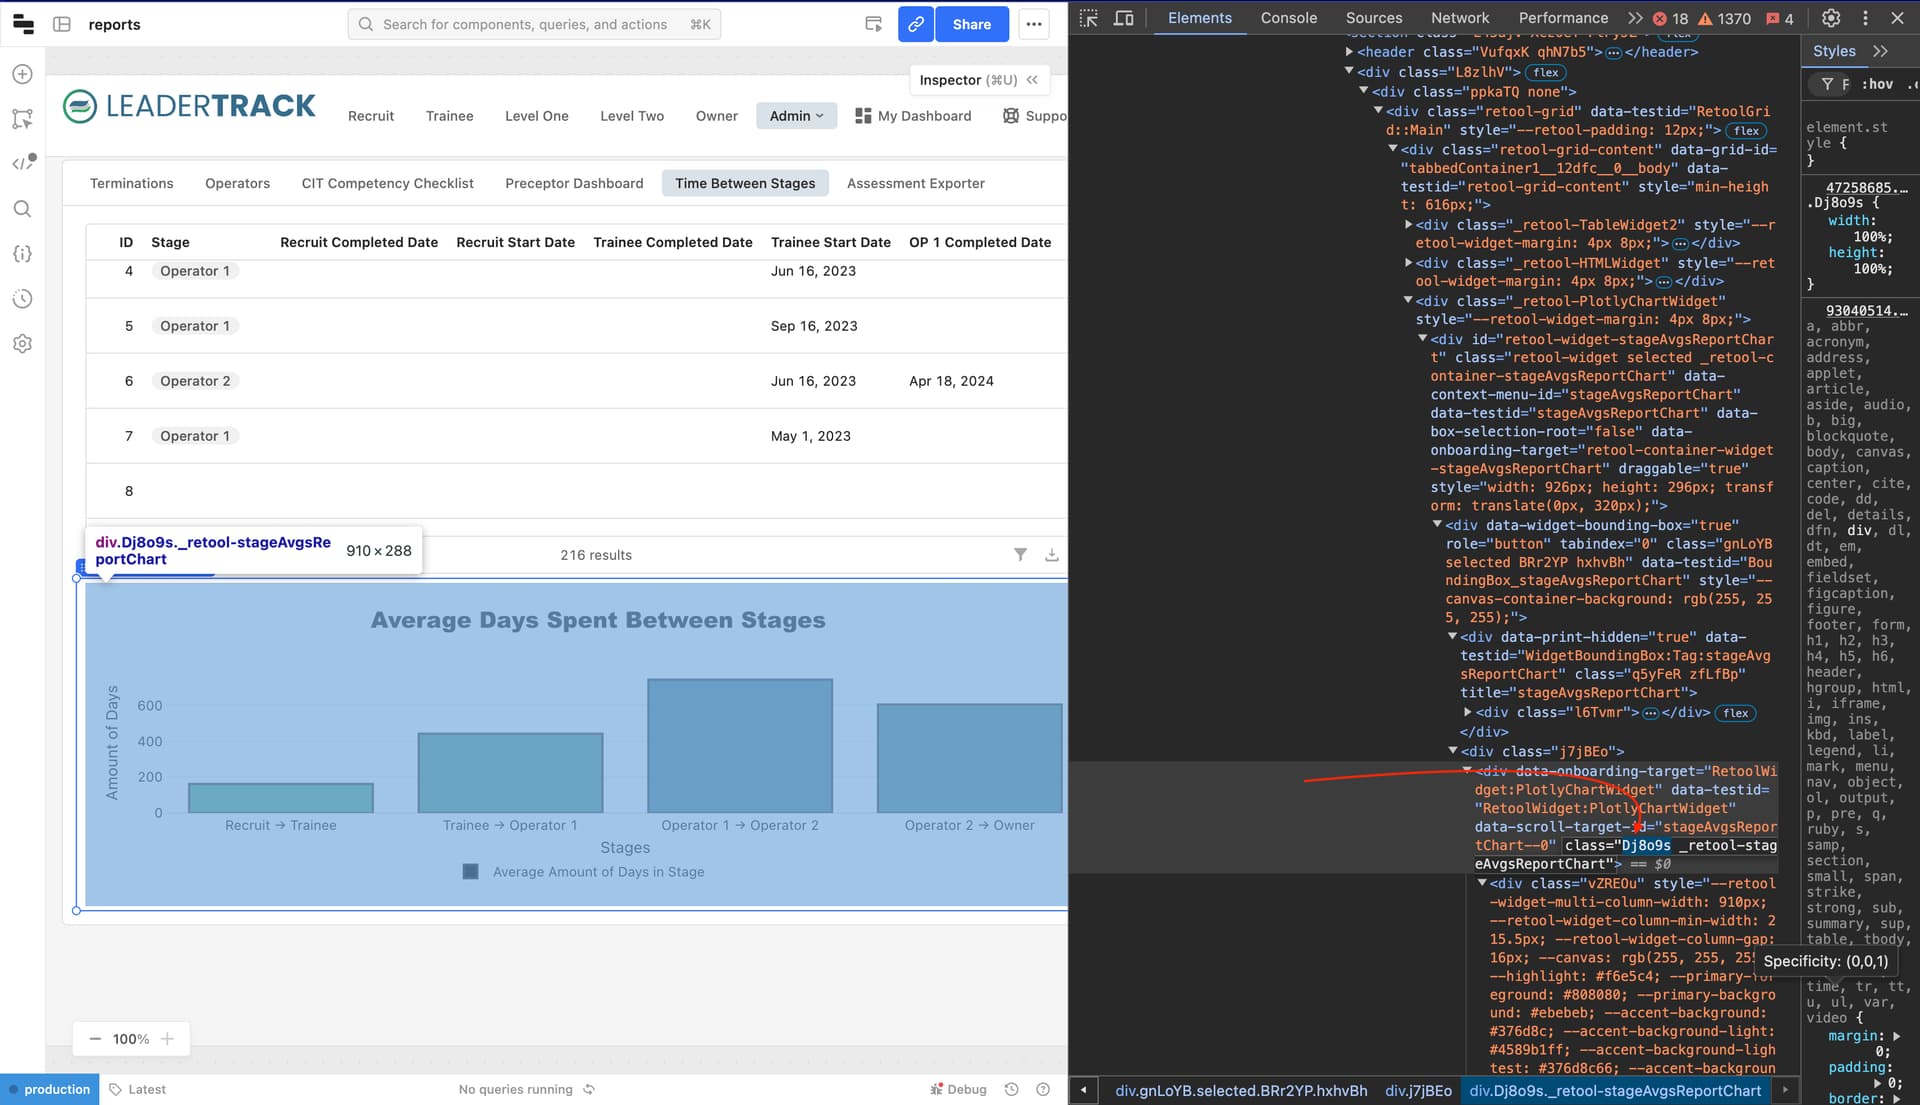
Unconventionally named class name that will likely change at some point during a future Retool feature update:
Referencing the highlighted attribute values above, we target class or ID names that are conventionally named (first image) instead of ones that are a random string of uppercased letters, lowercased letters, and/or special/numeric characters.
Below, I will attach 3 more images. Image 1 and image 2 will be of the opened 'elements' tab within my developer tools where I highlight the CSS targets for an animation on a bar graph that animates the bars up and applies a hue rotation every time the 'Time Between Stages' tab is opened within this app. Image 3 will be of the custom css style targeting so it can reliably reference unchanging nested element styles within my component:
- Image 1 (hitting first level of targeting after hitting my component ID):
- In the above image, 2 levels above the
<g class="points">element, you will notice an element<g class="barlayer mlayer" />. - I will first target the svg element, then target the
<g class="barlayer mlayer" />element using the^symbol instead of the*symbol -- where the difference is that^matches any substring value that follows the one you provide.- In image 3, you will see I target `[class^="bar"], which essentially means any attribute values that start with 'bar' will be targeted and styled.
- Image 2 (hitting the deeper nested points where all
<g class="point" />elements are stored, i.e. each 'bar' in chart component is an instance of a point or<g class="point" />):
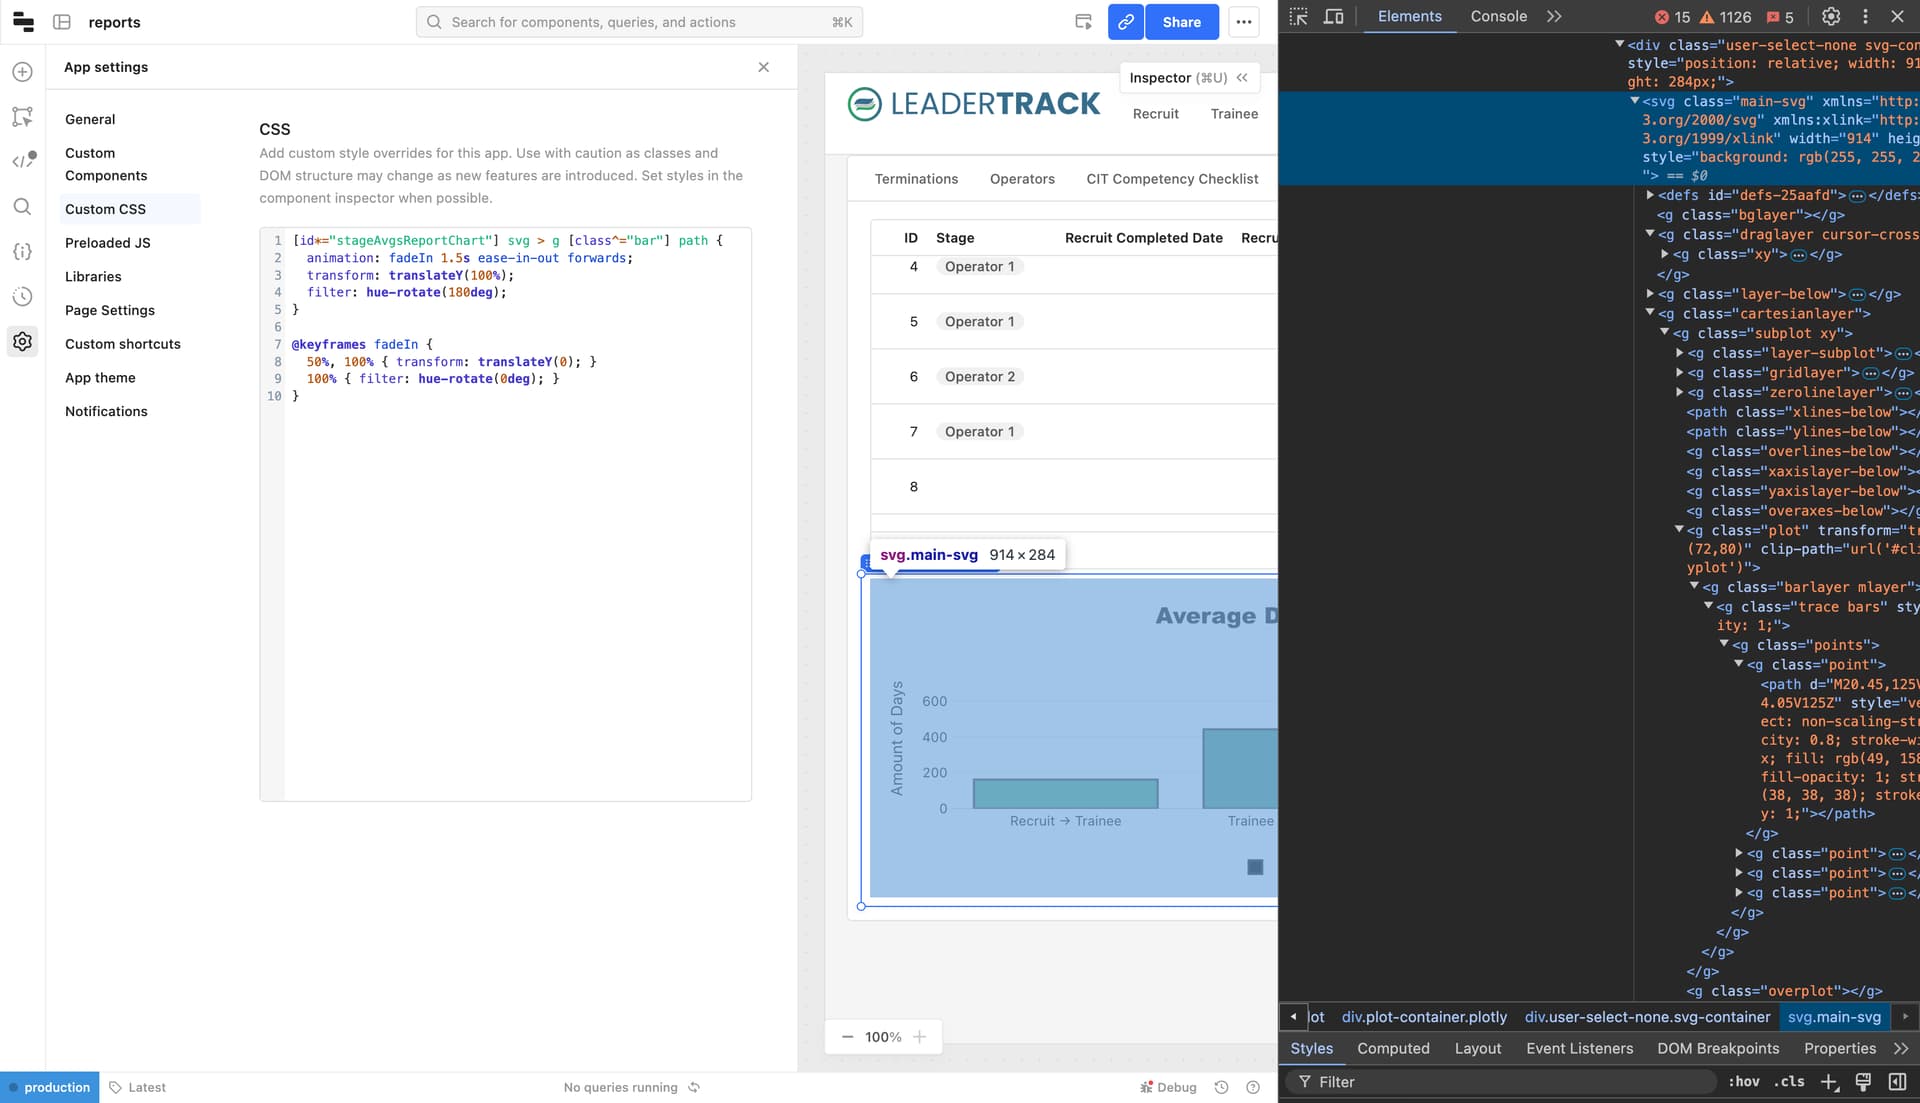
- Image 3 (how I target this using custom CSS while ensuring I am targeting classes/id's that will remain consistent and not change with updates):
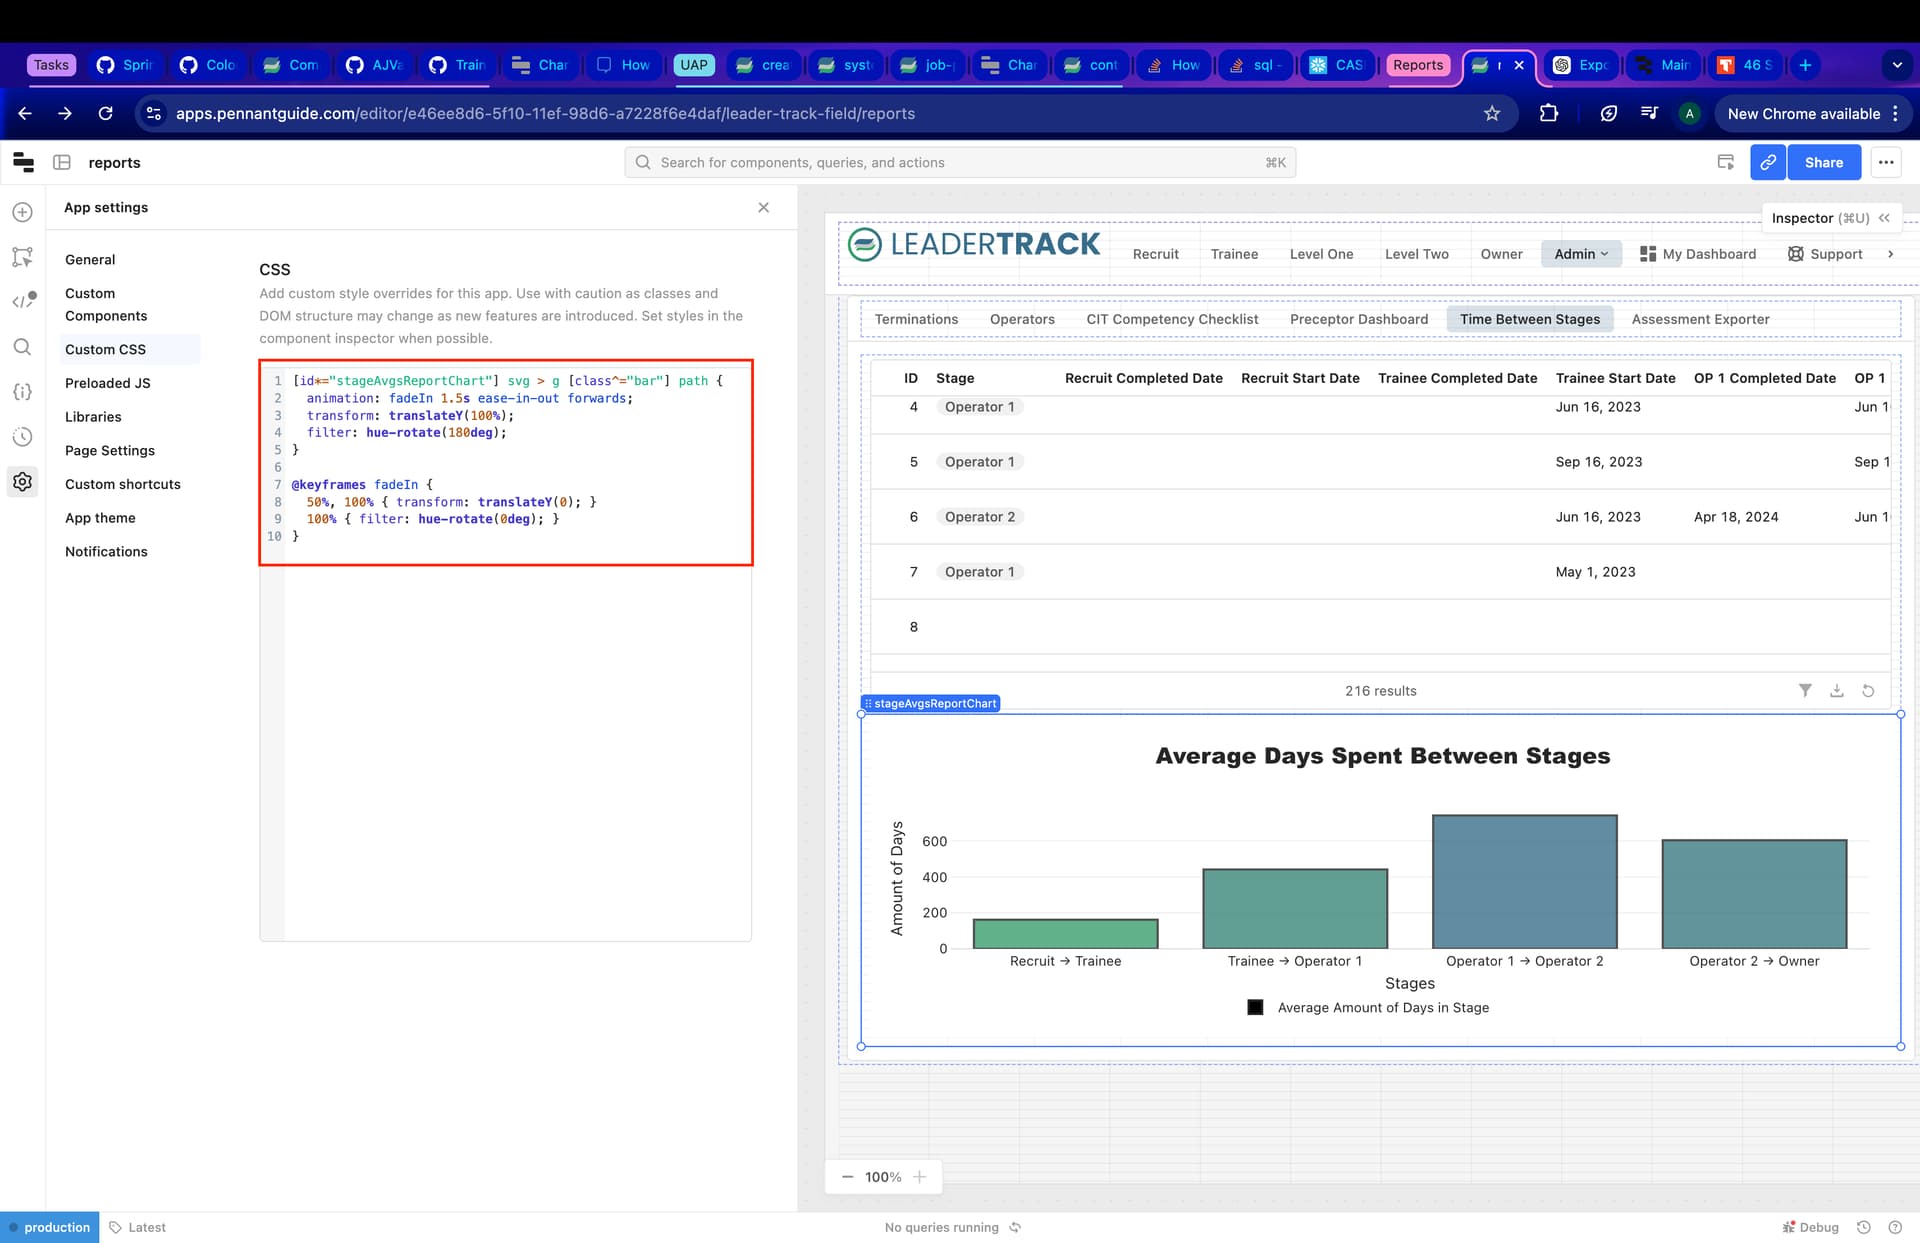
- Observing in the above image where I have highlighted my custom CSS with a red border, you can see how I'm hitting id's, classes, and element tags that are extremely unlikely to change, if ever.
- We first target our component by matching part of our ID string, as there is a chance Retool may change some wording around our ID target, but the name we give our component should always be included, Retool may just change/remove having 'retool-widget-' before the name, '--0' after the name, etc. etc.
- Then, we target the svg within our chart component, which all Plotly charts are SVGs in the Retool chart component.
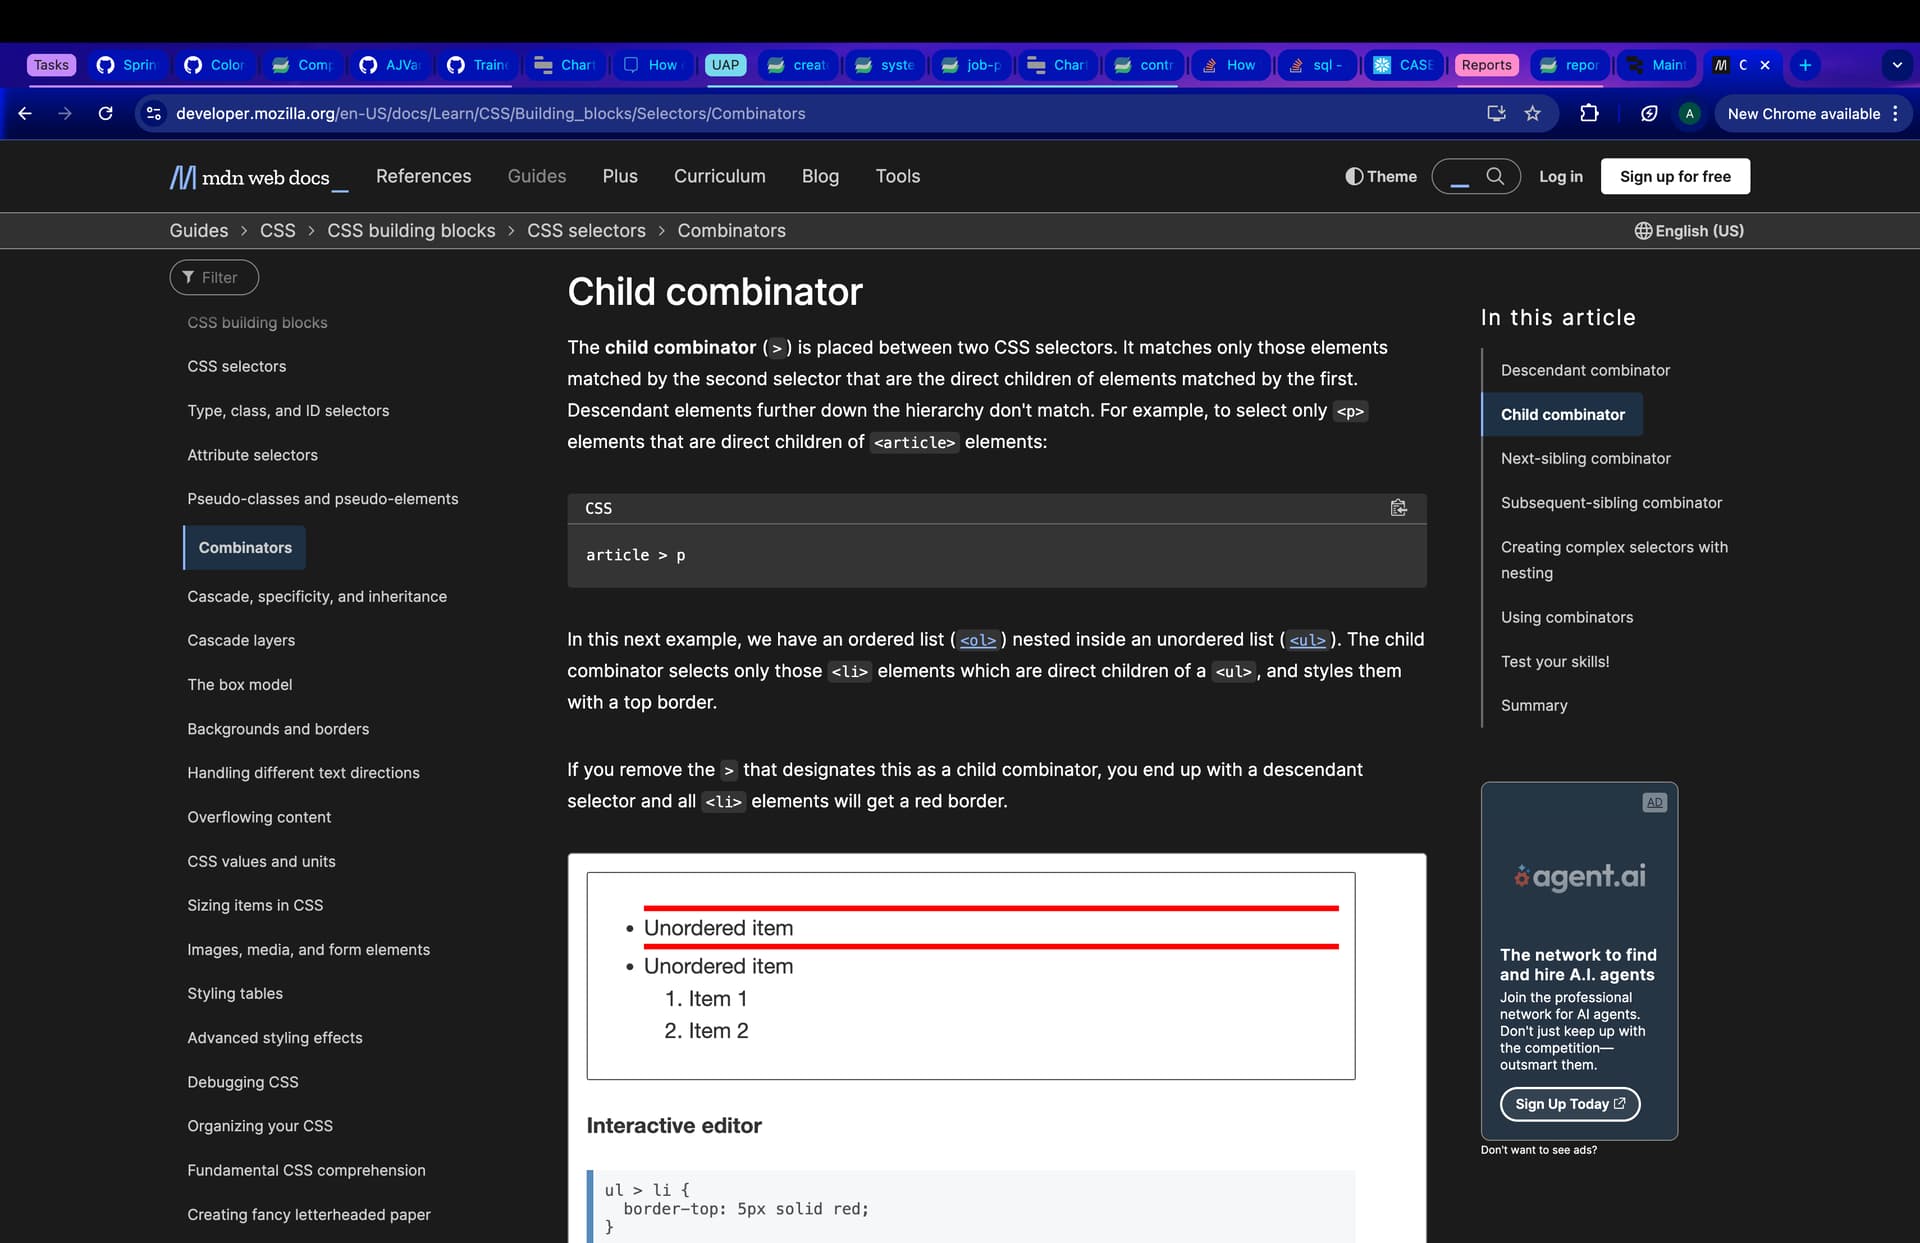
- We then target the directly following child of the SVG
<g />element using the>combinator.- For more info on CSS combinators, MDN has great documentation if you click this emphasized text, but I also attached another image below that explains this specific instance using the
>combinator.
- For more info on CSS combinators, MDN has great documentation if you click this emphasized text, but I also attached another image below that explains this specific instance using the
**
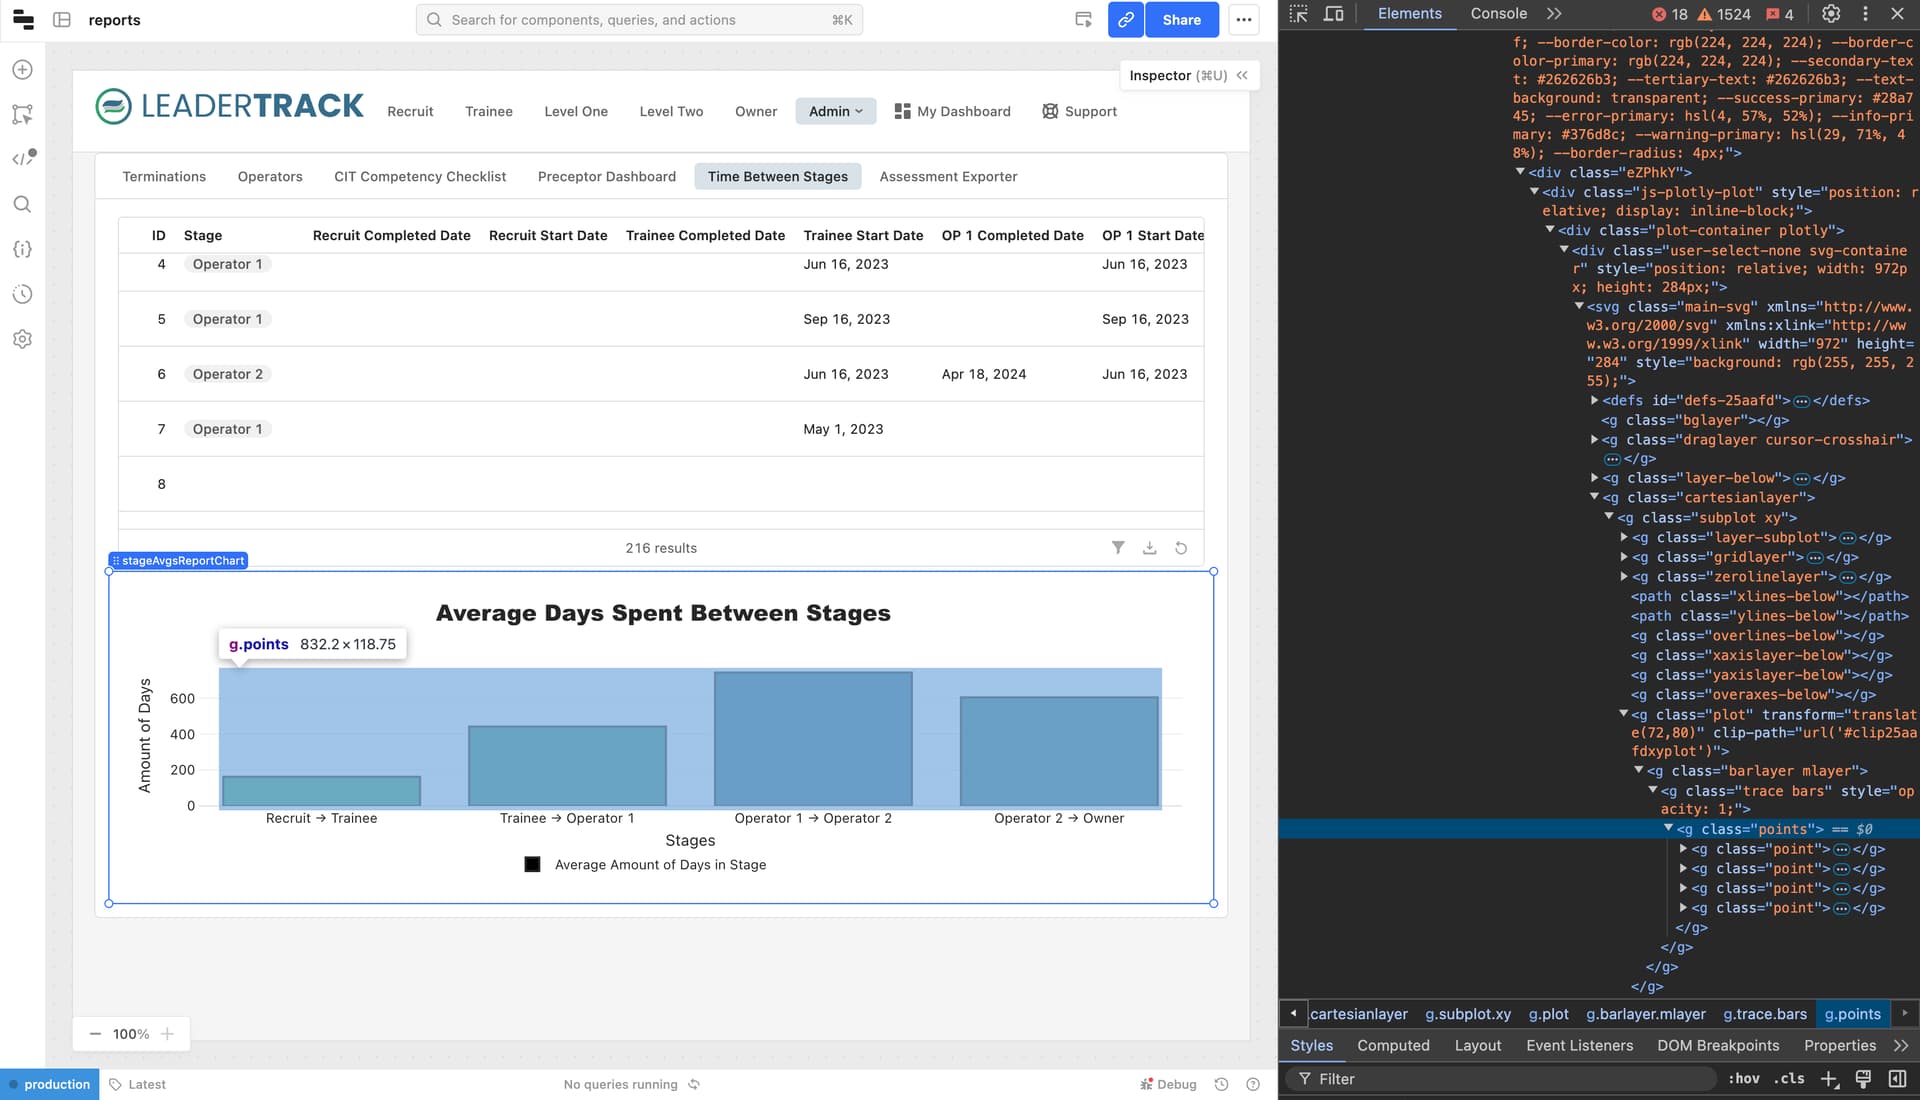
- For our following target, we are using what was described below image 1 or the carot symbol
^for substring matching any class attribute with a value that starts with the string value of 'bar...'. This will target the<g class="barlayer />element. This puts us 4 layers above each<path />element (aka each bar on the graph) that we are going to target and style with our final selector. - Finally, we hit our final target which are all path elements nested under the
<g class="barlayer />element.
This is a complex example that allows us to apply custom styling and in this case, even animations, to deeply nested html within Retool apps that targets only non-changing, or highly unlikely to change, CSS selectors to target that should always adhere through Retool feature updates.
I hope this explanation made sense for you to be able to apply for your own use cases! I will attach a final video link here that shows the final result of this working example, as well. I hope this helps!