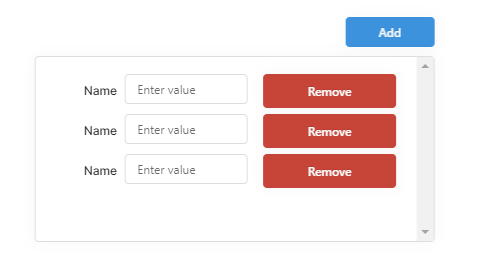
@Vinkal I just had to find a solution to this for a project, and managed to do it pretty directly by using temporary states and JS queries/transformations.
First, I'll briefly describe the approach here:
- To add a row, save the listView component values to a temporary state, then increment the listView size, then refill the listView from the temporary state
- To delete a row, save the listView component values to a temporary state, then remove the row from the JSON in the temporary state (not from the listView directly), then decrement the listView size, then refill the listView from the temporary state
And, quick note: I'm new to JavaScript, so it's likely some of the efficiency in the code could be improved -- and I'd welcome any feedback on my code
Step 1: Create your components and states
- Create a temporary state to store the listView data (
tempData), and set the initial value to a simple JSON object which will store the data of your rows. For the form in your screenshot above, it could be simply {"rows": [{"name": null}]} -- note: it's important that the rows are represented as an indexed array of objects, with key-value pairs for each relevant component.
- Create a temporary state to store the listView row count (
tempNumRows), and set the initial value to 1
- Create your listView (
listView1) and set Number of Rows to {{ tempNumRows.value }}
- Add your text input component (
textInput1) to your listView
- Add your remove button (
buttonRemove) to your listView
- Add your add button (
buttonAdd) outside of your listView
Now comes the fun scripting!
Step 2: Create your scripts
First, create a new JavaScript transformer (getCurrentData) and enter the following code:
var formData = {{ listView1.data }};

var currentData = {
  "rows": []
};

// loop through the listView data and grab the current value for each component
for (let i = 0; i < formData.length; i++) {
  var name = formData[i]["textInput1"];
  var newRow = {
    "name": name
  };

  currentData.rows.push(newRow);
}

return currentData;
Next, create a new JavaScript query (addNewRow) and enter the following code:
function addRow() {
  var currentData = getCurrentData.value;

  var emptyRow = {
    "name": null
  };

	currentData.rows.push(emptyRow);

  var currentDataSize = Object.keys(currentData.rows).length;

  tempData.setValue(currentData);

  tempNumRows.setValue(currentDataSize);
}

addRow();
Now, create a new JavaScript query (deleteCurrentRow) and enter the following code:
function deleteRow() {
  var currentData = getCurrentData.value;

  // use the built-in i variable, which resolves to the current row of the button that triggers this code
  currentData.rows.splice(i, 1);

  var currentDataSize = Object.keys(currentData.rows).length;

  tempData.setValue(currentData);

  tempNumRows.setValue(currentDataSize);
}

deleteRow();
Finally, we'll need a script to refill the listView from the temporary state when you're done making changes.
Create a new JavaScript query (refillForm) and enter the following code:
for (let i = 0; i < Object.keys(tempData.value.rows).length; i++) {
  // create a setValue statement for each nested component you need to fill
  textInput1[i].setValue(tempData.value.rows[i].name);
};
Step 3: Set the triggers for your JS code.
- In both the
addNewRow and deleteCurrentRow queries, set the On Success Trigger after the query runs to refillForm -- this will ensure the form refills properly, and only after the rows have been added/deleted (which, by default will clear the values of the listView components)
- Create an Event handler for
buttonAdd. Select the following options: Event: Click, Action: Trigger Query, Query: addNewRow
- Create an Event handler for
buttonRemove. Select the following options: Event: Click, Action: Trigger Query, Query: deleteCurrentRow
- Optionally, you could also disable the Remove button when only one row is present by setting Disable when to
{{ Object.keys(form.data).length == 1 }}
Hope this helps! Took a little trial and error, but I'm pleased with the results, personally.


