Process Incoming Webhooks for Retool
Aka real time notifications of a scored lead from Hubspot using a POST webhook
One of the limitations with retool is the difficulty in using it as an endpoint for http webhooks. Let's show how to work around this. It takes just three steps.
In step 1, we will trigger a http POST from Hubspot when a lead hits a lead scoring threshold. (My understanding is this requires the enterprise edition, but it depends on when you signed up.) In step 2, using a Cloudflare worker, we will accept the http POST and publish a message to the Ably pub/sub messaging platform and to a Slack channel. Lastly with step 3, in a retool app, we will receive this message as a SSE (Server Sent Event) and notify the user.
Quick aside: SSE is not as well known as websockets or polling for real time notifications. Learn more about them at Using server-sent events - Web APIs | MDN Using serverless functions with websockets is not recommend because it can get real expensive, real fast. We don't need the bidirectional communication of a websocket, so we will be using server sent events instead. SSE is almost universally supported by modern browsers, eliminating comparability problems.
Couple of notes on possible variations that we don't dig deeper into.
For step 1, the http POST could be a GET just as easily. (Hubspot only does http POST.) It could be triggered from any other platform capable of generating a webhook (http GET or POST or PUT or even DEL).
For step 2, instead of a Cloudflare worker, you could use an AWS Lambda Function, a Microsoft Azure Function, a Google Cloud Function, or any other serverless function platform. Step 2 could be bypassed (http POST directly to Ably), but it isn't as flexible. (Ably Realtime | Outbound webhooks overview) For step 3, we could also rerun a retool query instead of just a displaying a notification.
Step 1 Trigger a POST (aka trigger a webhook when a lead hits a scoring threshold)
If you are not familiar with lead scoring, here a good explanation Lead Scoring Explained: How to Identify and Prioritize High-Quality Prospects. Hubspot has an easy to use calculator that can help you figure out what your scoring model should look like. Lead generation strategies to start attracting business and drive growth and Lead generation strategies to start attracting business and drive growth
We will use manual lead scoring instead of the AI powered automatic scoring. Here's how to configure manually lead scoring in Hubspot How to Use Manual Lead Scoring in HubSpot and Understand the lead scoring tool.
Next let's create a workflow. Here's a walk through of how to create a workflow for a marketing lead. https://community.hubspot.com/t5/Lists-Lead-Scoring-Workflows/Use-workflows-and-lead-scoring-to-automate-your-lead/m-p/251142/highlight/true#M2564 Add an webhook workflow action that sends a http POST. (Docs on Workflows Create workflows, webhooks How to Trigger Webhooks in HubSpot Contact-Based Workflows, and more details of the webhook content https://legacydocs.hubspot.com/docs/methods/workflows/webhook_information.)
The walk through sets the POST destination url to a custom https://webhook.site url. We will change this later.
Step 2 Receive the http POST, publish a message, and update a slack channel
Cloudflare workers
We will follow the basic steps given in Templates · Cloudflare Workers docs, but customized for what we want to accomplish.
Let's start by signing up for a Cloudflare workers account at https://dash.cloudflare.com/sign-up/workers. I recommend you start with a workers.dev domain, but you can use your own domain if you would like.
Then install wranger, a cli tool to manage workers from Cloudflare. You need node, npm, and n installed. (I prefer n to nvm, but that's a personal preference. nvm can be used too.)
npm install -g @cloudflare/wrangler
Alternatively you can use Overview · Cloudflare Workers docs to develop with instead. (It has a nice http test functionality.)
We will use the worker template.
wrangler generate my-app https://github.com/cloudflare/worker-template
Note: "your-directory-path-here" will be the directory you run the wrangler command in.
This yields:
 Creating project called `my-app`...
 Done! New project created /your-directory-path-here/my-app
🕵️  You will need to update the following fields in the created wrangler.toml file before continuing:
🕵️  You can find your account_id in the right sidebar of your account's Workers page, and zone_id in the right sidebar of a zone's overview tab at https://dash.cloudflare.com
- account_id
Update the wrangler.toml file inside the my-app directory with the account_id. If you are using your own domain instead of a workers.dev domain, it will need a zone_id too.
name = "my-app"
type = "webpack"
account_id = "my-account-id-number-here"
workers_dev = true
route = ""
zone_id = "optionally my-zone-id here if you are using your own domain"
See Templates · Cloudflare Workers docs for more details on how to customize the wrangler.toml file for your situation.
index.js to start will be
addEventListener('fetch', event => {
  event.respondWith(handleRequest(event.request))
})
/**
 * Respond with hello worker text
 * @param {Request} request
 */
async function handleRequest(request) {
  return new Response('Hello worker!', {
    headers: { 'content-type': 'text/plain' },
  })
}
If you want to filter based on http verbs and other criteria see Conditional response · Cloudflare Workers docs for examples. For simplicity, we won't filter nor will we verify the request signature that HubSpot provides. See https://legacydocs.hubspot.com/docs/methods/crm-extensions/crm-extensions-overview#request-signatures if you would like to verify the incoming http POST.
Slack webhooks
To post the new lead to a slack channel, we will use a webhook. Given this show and tell is already quite long, I will just reference the slack walk though about Slack incoming webhooks at Sending messages using incoming webhooks | Slack Developer Docs. Following those steps we will yield a webook in the form of
https://hooks.slack.com/services/T00000000/B00000000/XXXXXXXXXXXXXXXXXXXXXXXX
We don't want to store this in code repositories since it allows access to our slack channel. Let's store it as a secret that our Cloudflare worker can access with the following wrangler command
wrangler secret put SECRET_SLACK_WEBHOOK_URL
Here a command line example with $ as the prompt
enter
wrangler secret put SECRET_SLACK_WEBHOOK_URL
responses with
Enter the secret text you'd like assigned to the variable
SECRET_SLACK_WEBHOOK_URL on the script named my-app:
enter (use your Slack webhook instead of the one shown below)
https://hooks.slack.com/services/T00000000/B00000000/XXXXXXXXXXXXXXXXXXXXXXXX
responses with
🌀  Creating the secret for script name my-app
🌀  Worker my-app doesn't exist in the API yet. Creating a draft Worker so we can create new secret.
There are three properties that we are interested in sending over to the slack channel, the lead first name, lead last name, and profile url in Hubspot. See https://legacydocs.hubspot.com/docs/methods/workflows/webhook_information for an example of the JSON data passed in and other properities that can be sent.
We only send over a single text string. Customization of the content is available using slack blocks and other formatting. See Sending messages using incoming webhooks | Slack Developer Docs, Formatting message text | Slack Developer Docs & Block Kit | Slack Developer Docs for more details.
To send the slack message via webhook, we'll add the following to the top of index.js.
/***
 * sends new lead message to slack channel
 * @param {Request} request
 */
const sendSlackMessage = async request => {
  try {
    const body = await request.text()
    const jsonData = JSON.parse(body)
    const lastName = jsonData.properties.lastname.value
    const firstName = jsonData.properties.firstname.value
    const profileUrl = jsonData["profile-url"]
    const slackContent = {
      "text": `${firstName} ${lastName} is a newly scored lead. Profile: ${profileUrl}`
    }

    const postToSlack = await fetch(SECRET_SLACK_WEBHOOK_URL, {
      body: JSON.stringify(slackContent),
      method: "POST",
      headers: { "Content-Type": "application/json" },
    })

    return new Response("OK", { status: 200 })
  } catch (err) {
    const errorText = "Unable to post to slack channel"
    return new Response(errorText, { status: 500 })
  }
}
We will add a call to sendSlackMessage into the handleRequest function later.
Ably Integration
First, sign up for an ably account at Sign up | Ably Realtime. Once signed up and logged in grab your api key. (See example at Build Pub/Sub Messaging with Ably’s Chat SDK)
We will store this api key as secret using
wrangler secret put SECRET_ABLY_API_KEY
and the similar steps we used for storing the Slack url secret above.
We will need an ably channel to communicate over. It doesn't need to be secret. Both the Cloudflare worker and the retool client will need the same identifier. A common strategy is to use uuids (say 887c4267-6566-4201-9257-aea4bcd7afde or some other unique identifier).
Let's add this to the end of the wragler.toml.
vars = { ABLY_CHANNEL = "your-ably-channel-here" }
where "your-ably-channel-here" is ...wait for it... your ably channel identifier. We will use ABLY_CHANNEL in index.js.
Now install ably.
npm install ably --save
We will use the REST (stateless) version of the api.
Add the following to index.js after sendSlackMessage, so we can send a lead to the Ably platform
/***
 * sends new lead data to ably channel
 * @param {Request} request
 * @param {string} ablyChannel
 */
const sendAblyMessage = async (request, ablyChannel) => {
  try {
    const body = await request.text()
    const data = JSON.parse(body)
    const message = {
      "name":"Hubspot new lead",
      "data":data
    }

    const URL = `https://rest.ably.io/channels/${ablyChannel}/messages`;

    const postToAbly = await fetch(`${URL}`, {
      method: 'POST',
      headers: {
        'Content-Type': 'application/json',
        'X-Ably-Version': '1.2',
        'Authentication': 'Basic ' + Buffer.from(SECRET_ABLY_API_KEY).toString('base64')
      },
      body: JSON.stringify(message)
    });

    return new Response("OK", { status: 200 })
  } catch (err) {
    const errorText = "Unable to post to ably channel"
    return new Response(errorText, { status: 500 })
  }
}
To post to the slack channel and the ably channel, we add the following to beginning of the handleRequest function.
const responses = await Promise.all([
  sendSlackMessage(request),
  sendAblyMessage(request, ABLY_CHANNEL),
])
We already set ABLY_CHANNEL in wrangler.toml, so we don't need to add it index.js.
Here's the final versions of wrangler.toml and index.js.
wrangler.toml
name = "my-app"
type = "webpack"
account_id = "68a615231551ebb9a35acfe7e2621007"
workers_dev = true
route = ""
zone_id = ""
vars = { ABLY_CHANNEL = "your-ably-channel-here" }
index.js
addEventListener('fetch', event => {
  event.respondWith(handleRequest(event.request))
})

/***
 * sends new lead message to slack channel
 * @param {Request} request
 */
const sendSlackMessage = async request => {
  try {
    const body = await request.text()
    const jsonData = JSON.parse(body)
    const lastName = jsonData.properties.lastname.value
    const firstName = jsonData.properties.firstname.value
    const profileUrl = jsonData["profile-url"]
    const slackContent = {
      "text": `${firstName} ${lastName} is a newly scored lead. Profile: ${profileUrl}`
    }

    const postToSlack = await fetch(SECRET_SLACK_WEBHOOK_URL, {
      body: JSON.stringify(slackContent),
      method: "POST",
      headers: { "Content-Type": "application/json" },
    })

    return new Response("OK", { status: 200 })
  } catch (err) {
    const errorText = "Unable to post to slack channel"
    return new Response(errorText, { status: 500 })
  }
}

/***
 * sends new lead data to ably channel
 * @param {Request} request
 * @param {string} ablyChannel
 */
const sendAblyMessage = async (request, ablyChannel) => {
  try {
    const body = await request.text()
    const data = JSON.parse(body)
    const message = {
      "name":"Hubspot new lead",
      "data":data
    }

    const URL = `https://rest.ably.io/channels/${ablyChannel}/messages`;

    const postToAbly = await fetch(`${URL}`, {
      method: 'POST',
      headers: {
        'Content-Type': 'application/json',
        'X-Ably-Version': '1.2',
        'Authentication': 'Basic ' + Buffer.from(SECRET_ABLY_API_KEY).toString('base64')
      },
      body: JSON.stringify(message)
    });

    return new Response("OK", { status: 200 })
  } catch (err) {
    const errorText = "Unable to post to ably channel"
    return new Response(errorText, { status: 500 })
  }
}

/**
 * Respond with hello worker text
 * @param {Request} request
 */
async function handleRequest(request) {
  try {
    const responses = await Promise.all([
      sendSlackMessage(request),
      sendAblyMessage(request, ABLY_CHANNEL),
    ])

    return new Response('OK', {
      headers: { 'content-type': 'text/plain' },
      status: 200,
    })
  } catch (err) {
    return new Response(err.message, { status: 500 })
  }
}
To make sure there are no errors, run
wrangler build
and fix any errors.
It should respond with
✨ Built successfully, built project size is X KiB.
Run
wrangler publish
to publish the Cloudflare worker.
It respond with
✨  Built successfully, built project size is X KiB.
✨  Successfully published your script to
 https://my-app.your-subdomain.workers.dev
To insure it works, either use curl or httpie to send a POST message to the published url shown above.
wrangler dev
which deploys the worker script to a local dev server, is also useful in debugging.
Update the Hubspot webhook location.
We had mentioned we would late update the Hubspot POST destination url we used in the last part of "Step 1 Trigger a POST". Let's do this now. Replace the webhook.site url placeholder with the Cloudflare worker url. Get the worker url from the wrangler publish command above. e.g.
https://my-app.your-subdomain.workers.dev.
Reference docs from Step 1 for setting the Hubspot destination url are repeated here for convenience. Docs on Workflows Create workflows, webhooks How to Trigger Webhooks in HubSpot Contact-Based Workflows, and more details of the webhook content https://legacydocs.hubspot.com/docs/methods/workflows/webhook_information.
Step 3 Receive Message, populate timeline, and notify user
Whew, almost finished. Now we need to receive the lead data in retool.
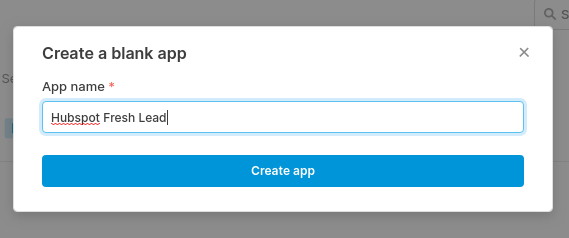
Create a new application in retool. Name it
Hubspot Fresh Lead
Select aTimeline Component and drag it onto the canvas.

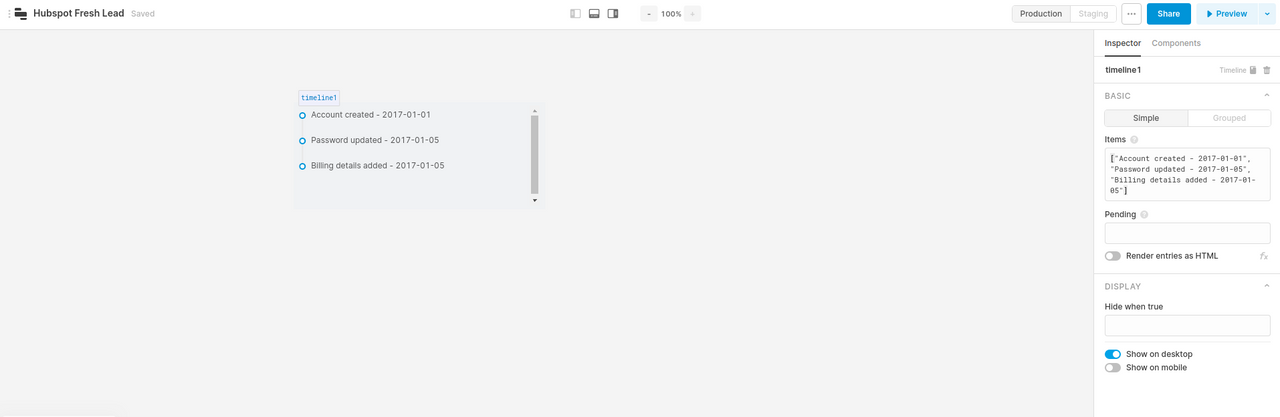
Let populate the timeline with the realtime data we receive from the Ably platform.
Select query1. Select Resource Run JS Code (javascript).
Paste in the following code. It receives the SSE messages and data, then stores them in a temporary state array variable (You could also use localStorage instead of temporary state.). See Retool Docs & Retool Docs for more info about temporary state. This data is then displayed in a timeline component and a notification.

Note: Change ABLY_CHANNEL and ABLY_KEY to your channel and key.
const ABLY_CHANNEL = "your-ably-channel-here"
const ABLY_KEY = "your-ably-key-here"

const url = `https://realtime.ably.io/sse?v=1.2&key=${ABLY_KEY}&channels=${ABLY_CHANNEL}`
const eventSource = new EventSource(url);

eventSource.onmessage = (event) =>  {
  //copy temporary state to local array
  let localArray = state1.value

  //get the event.data from sse event
  const message = JSON.parse(event.data);

  //construct lead string
  const leadString =
    moment().format('LLLL') + ' ' +
    message.name + ' ' +
    'Name: ' +
    message.data.properties.lastname.value + ' ' +
    message.data.properties.firstname.value + ' ' +
    'Profile:' +
    data["profile-url"]

  //add new lead to local array
  localArray.push(leadString)

  //notification of new lead
  utils.showNotification({
    title: message.name,
    description: leadString,
    notificationType: info
  })
  //update temporary state variable state1 with updated array
  state1.setValue(localArray)
};

//eventSource.onopen = function() {
//  //debug
//  console.log(`Connected and subscribed to channel: ${ABLY_CHANNEL}`);
//}

eventSource.onerror = (error) => {
  //copy temporary state to local array
  let localArray = state1.value
  let now = moment()

  if (error.data) {
    //store error
    localArray.push(
      now.format('LLLL') + ' ' +
      `Error: ${error.data}`
    );
    //notify error
    utils.showNotification({
      title: "Error"
      description: now.format('LLLL') + ' ' + `Error: ${error.data}`,
      notificationType: error
    })
  } else {
    //store error
    localArray.push(
      now.format('LLLL') + ' ' +
      `Error connecting to Ably`
    );
    //notify error
    utils.showNotification({
      title: "Error connecting to Ably",
      description: now.format('LLLL') + ' ' + `Error connecting to Ably`,
      notificationType: error
    })
  }
  //update temporary state variable state1 with updated array
  state1.setValue(localArray)
}

return
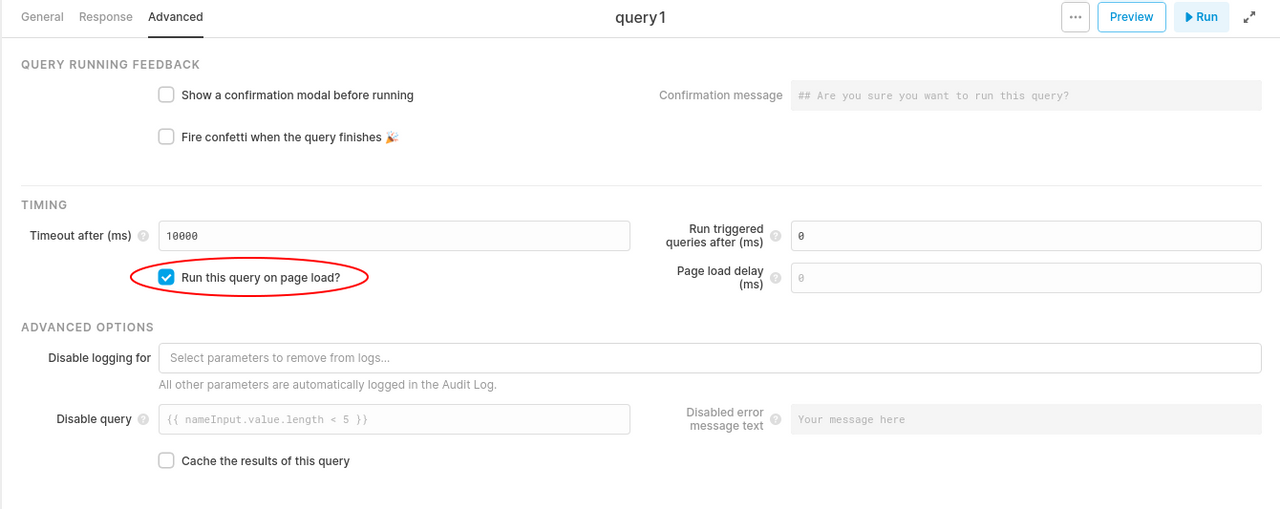
We want this to run when the page loads. Click "Advanced" and select the checkbox "Run this query on page load". Click save in the upper right.
Let's set the data in the timeline.
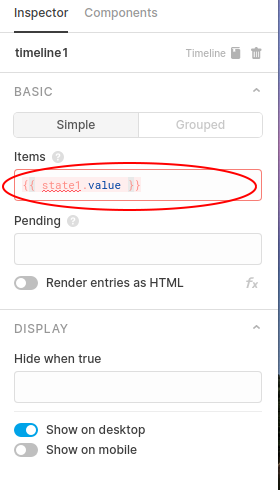
Select the timeline1 component on the canvas. Under Items replace
["Account created - 2017-01-01", "Password updated - 2017-01-05", "Billing details added - 2017-01-05"]
with
{{ state1.value }}
so that it will show the list of leads and the time of notification.
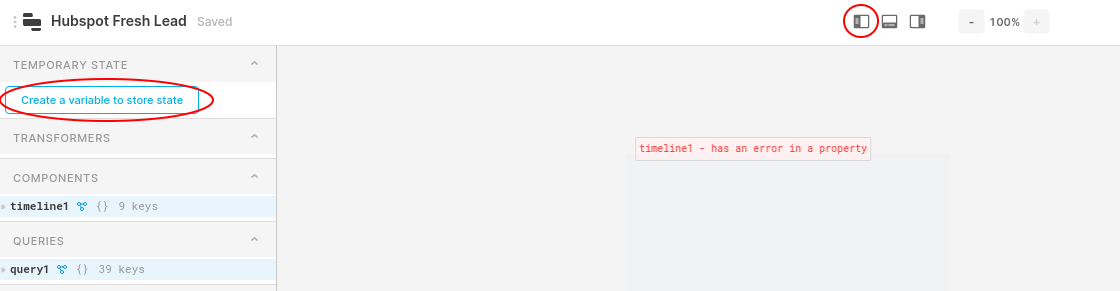
You may see an error, "state1 not defined." & "timeline1 has an error in a property". Let's fix those.
Start by showing the left Panel. Click Left Panel Icon at Top. Once the left panel appears on the left, click "Create a variable to store state".
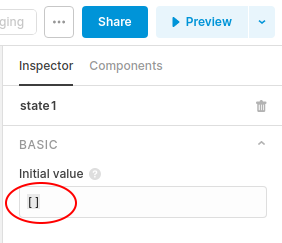
This will create state1 under TEMPORARY STATE. Instead of inializing to null, we want to set the initial value of state1 to be an empty array.
On the left, click the bold state1 and on the right side it will show an Inspector with state1.

Under Initial value set it to [].
That should do it! We are all done.
To recap what we have done:
- Hubspot POSTs a newly scored lead to a Cloudflare worker.
New Lead POST ➜ Cloudflare worker - The Cloudflare worker POSTs to both a Slack channel and Ably channel.
Cloudflare worker POST ➜ Slack channel
Cloudflare worker POST ➜ Ably channel - The Ably sends lead data as a "server sent event" (SSE) which is received in the retool application.
Ably SSE ➜ retool application - Retool stores the data and displays the new leads in a timeline and shows a notification.
retool ➜ populates timeline component
retool ➜ displays notification
The big takeaway here is the ability to transfer data from outside platorms via webhooks that then send server sent events into retool applications. It's a very powerful tool.
Toolmakers, on your mark, get set, create!
Thaddeus
Disclaimer: All product names, company name, trademarks, and brands are property of their respective owners. All names (product, brand, company) used in this post are for identification purposes only. Use of these names do not imply endorsement.